Create a custom Raspberry Pi car dashboard with real-time vehicle data display, interactive features, and diagnostic monitoring using an OBD-II adapter and Python.
The Smart Car Dashboard System
Cars have come a long way in terms of technology, and with the rise of smart devices, you can now add high-tech features to your vehicle. One such feature is a smart car dashboard. A smart dashboard can display real-time data about your vehicle, such as speed, fuel levels, engine performance, and much more. With the help of a Raspberry Pi, you can create a smart dashboard system for your car that can give you valuable insights on the go.
Building a smart dashboard system with Raspberry Pi allows you to monitor important data from your car directly on a screen. The good news is that even if you’re new to Raspberry Pi, this project is beginner-friendly and can be achieved with some basic guidance and a little creativity. Whether you want to keep track of your fuel consumption, monitor engine health, or display other real-time statistics, this guide will walk you through the entire process step by step.
By following this tutorial, you will have a fully functional smart car dashboard that will make your driving experience both safer and more enjoyable. Let’s dive into how to build your very own smart dashboard using Raspberry Pi!
Components Required for the Dashboard
Before you begin building the smart car dashboard, you will need a few essential components to get everything working. Here’s a list of all the parts required for this project:
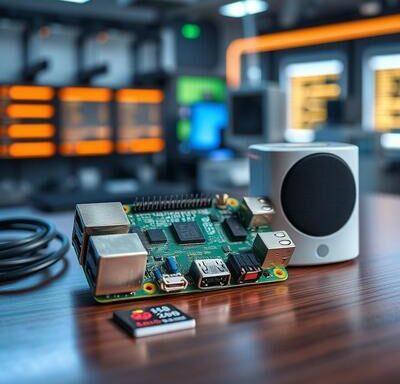
- Raspberry Pi (3 or 4): The Raspberry Pi will serve as the central processing unit for your dashboard. It will handle everything from reading data from the car to displaying it on the screen.
- OBD-II Adapter: The OBD-II (On-Board Diagnostics) adapter plugs into your car’s OBD-II port (usually found near the driver’s seat). It allows your Raspberry Pi to read real-time data from your car’s engine control unit (ECU), such as vehicle speed, fuel levels, and engine temperature.
- Touchscreen Display: A touchscreen is the ideal display for your car’s dashboard. It will show all the data collected by your Raspberry Pi. A 7-inch touchscreen display is a good size for most vehicles.
- Power Supply for Raspberry Pi: To power your Raspberry Pi inside your car, you will need a 12V to 5V power converter. This device will step down the voltage from your car’s battery (12V) to the required 5V for the Raspberry Pi.
- Wires and Connectors: These will be used to connect the Raspberry Pi, OBD-II adapter, and display. Make sure to get the right cables to ensure everything is securely connected.
- Mounting Case: A durable case for your Raspberry Pi will help keep it safe from dust and any potential damage. You can place the Raspberry Pi under the dashboard or in the glove compartment.
- Software: You will need to install a few programs and libraries on your Raspberry Pi to make everything work, including Python, Python-OBD, and libraries like Tkinter or Pygame to display data on the screen.
Once you have all these components, you’re ready to start assembling your smart car dashboard.

Step-by-Step Guide to Assembly
Step 1: Connect the OBD-II Adapter to Your Car
The first step in the process is to connect the OBD-II adapter to your car’s OBD-II port. This port is typically located beneath the dashboard on the driver’s side. If you’re unsure where it is, check your car’s manual.
- Plug the OBD-II adapter into this port. You may have a Bluetooth or USB-based adapter.
- If you’re using a Bluetooth OBD-II adapter, you’ll need to pair it with the Raspberry Pi. To do this, go to your Raspberry Pi’s Bluetooth settings and search for the adapter. Pair it once it shows up in the list.
- If you have a USB OBD-II adapter, plug it directly into one of the USB ports on the Raspberry Pi.
Once this is done, your Raspberry Pi can now communicate with your car’s computer system.
Step 2: Set Up the Touchscreen Display
Next, connect the touchscreen to your Raspberry Pi. If you are using an HDMI touchscreen, simply connect it to the HDMI port on the Raspberry Pi.
- For non-touch LCD displays, you may need to connect it to the GPIO pins of the Raspberry Pi. In this case, make sure you have the correct cables and adapters to connect the two.
- After physically connecting the display, power on the Raspberry Pi, and you should see the desktop environment on the screen. If you’re using a touchscreen, you can interact with the Raspberry Pi directly from the screen.
Step 3: Power the Raspberry Pi
Your Raspberry Pi requires power to function, and in your car, the power comes from the vehicle’s battery. You will need a 12V to 5V power converter, which is also called a car power adapter.
- Connect the input of the power converter to your car’s power supply (usually from the cigarette lighter or a dedicated 12V power outlet).
- Connect the output of the power converter to the micro-USB power input of the Raspberry Pi.
This step will ensure that your Raspberry Pi is powered while you are on the road.
Step 4: Mount the Raspberry Pi and Display
Now that everything is connected, it’s time to mount the components securely inside the car.
- Find a good spot for your Raspberry Pi inside the vehicle, such as in the glove compartment or underneath the dashboard. You want it to be out of sight, safe, and not too exposed to moisture or dust.
- The touchscreen display should be mounted in a location where it’s easily visible while driving but doesn’t obstruct your view or control of the vehicle. You can use custom mounts to secure the display to the dashboard or console.
Ensure that the wiring is neat and not obstructing any controls or interfering with driving.
Step 5: Connect the Wires
Use jumper wires and connectors to link everything together.
- Ensure that all connections between the Raspberry Pi, OBD-II adapter, and touchscreen are solid and secure.
- If you’re using a Bluetooth OBD-II adapter, you don’t need any physical wires for the connection, but for USB adapters, you’ll need to connect the adapter to the Raspberry Pi’s USB port.
Make sure the cables are out of the way and properly secured with cable ties to avoid any interference while driving.
Programming the Dashboard Software
Step 1: Install Python and Necessary Libraries
Now that the hardware setup is complete, you need to install the necessary software on your Raspberry Pi to enable communication with the OBD-II adapter.
- Open a terminal window on the Raspberry Pi.
- Install Python if it isn’t already installed:
- Install the Python-OBD library, which allows the Raspberry Pi to communicate with the OBD-II adapter:
Step 2: Write the Code to Fetch Vehicle Data
Now, let’s create a Python script that will request data from the car and display it. For example, you can fetch the car’s speed, fuel level, and engine temperature:
This simple code will display the current speed of the car. You can expand this script to include more data points, such as RPM or fuel level.
Step 3: Display Data on the Screen
Now, you’ll need to create a graphical user interface (GUI) to display the data on the screen. You can use libraries like Tkinter or Pygame to design the layout.
- For example, you could display the speed in a large, easy-to-read font and show additional vehicle statistics in smaller sections.
- With Python and Tkinter, you can create labels and text boxes that update automatically with new data.
Here’s a simple Tkinter script to display speed:
Step 4: Test the System
Once the code is complete, test your system by running the script. You should see the car’s speed updating in real-time on the display. Take the car for a test drive and check if all the data updates correctly on the dashboard.
Final Adjustments and Features
Once the basic dashboard is running, you can customize it further:
- Add More Data: You can display additional information, such as fuel level, engine temperature, or tire pressure.
- Design Enhancements: Customize the dashboard layout, fonts, and colors for a more personalized look.
- Smart Notifications: Implement alerts for issues such as low fuel, engine problems, or maintenance reminders.
Building a smart car dashboard with Raspberry Pi is a rewarding project that enhances your driving experience. With the right components, setup, and software, you can display critical vehicle data, make your dashboard interactive, and even implement smart notifications. Whether you are a beginner or an experienced Raspberry Pi user, this project is a great way to learn new skills while creating something functional and useful.
By following these clear, step-by-step instructions, you’ll be able to design and set up a high-tech car dashboard that brings your vehicle into the modern era of connectivity and convenience.
FAQ
1. How do I connect the Raspberry Pi to the OBD-II adapter?
To connect your Raspberry Pi to the OBD-II adapter, plug the adapter into your car’s OBD-II port, typically located beneath the dashboard near the driver’s seat. Depending on your OBD-II adapter, you will connect it to the Raspberry Pi via USB or Bluetooth. For a USB connection, simply plug the adapter into the Raspberry Pi’s USB port. If you are using a Bluetooth adapter, pair it with the Raspberry Pi through the Bluetooth settings. Once connected, you can begin reading diagnostic data from the vehicle’s ECU (Engine Control Unit).
For more details on connecting Raspberry Pi to an OBD-II adapter, visit www.raspberrypi.org/documentation/.
2. What other data can I display on the dashboard?
With your Raspberry Pi-powered dashboard, you can display a wide range of real-time data from your car’s ECU, including vehicle speed, fuel level, engine temperature, RPM (revolutions per minute), throttle position, and more. Additionally, you can monitor vehicle diagnostic trouble codes (DTCs) that help you troubleshoot issues. You can customize your dashboard to show the information that’s most relevant to you, enhancing your driving experience and safety.
Learn more about vehicle data parameters and what you can track at www.obd-codes.com.
3. How can I make my dashboard more interactive?
To make your dashboard more interactive, consider adding a touchscreen display, which allows you to touch and swipe to navigate through the information. You can also integrate voice commands using libraries such as SpeechRecognition in Python, enabling you to control the system hands-free. For additional interactivity, you could implement smart notifications, such as alerts for low fuel levels or engine issues, which could pop up on the screen or be sent to your phone via an app.
For more on adding interactivity and touch capabilities, visit www.raspberrypi.org/documentation/.
4. Do I need advanced programming skills for this project?
No, this project is designed to be beginner-friendly, making it an excellent choice for those new to programming and Raspberry Pi. Most of the setup involves basic Python scripting for reading OBD-II data and displaying it on the screen. Additionally, there are many tutorials and resources available online that walk you through the process step by step. As you get more comfortable, you can add more advanced features, but basic functionality is achievable with minimal programming experience.
Check out beginner-friendly tutorials on Python and Raspberry Pi at www.raspberrypi.org/learning/.
5. Can I use this setup in any car?
Yes, this setup will work with any car that has an OBD-II port. Most vehicles manufactured after 1996 are equipped with an OBD-II port, which is required for communication with the vehicle’s onboard computer system. If you’re unsure whether your car has an OBD-II port, you can consult the vehicle’s manual or look for the port near the driver’s seat under the dashboard or near the center console.
For more information about OBD-II compatibility and finding your car’s OBD-II port, visit www.obdii.com.
6. Can I monitor multiple cars with one Raspberry Pi setup?
Yes, you can monitor multiple cars with one Raspberry Pi, but each car will need its own OBD-II adapter. You can switch between cars by disconnecting and reconnecting the OBD-II adapter or using multiple Bluetooth adapters and toggling between them in the software.
For more information on connecting multiple OBD-II adapters to Raspberry Pi, visit https://www.raspberrypi.org.
7. How can I add custom alerts for vehicle diagnostics?
You can program custom alerts using Python to trigger when certain thresholds are met, such as low fuel or high engine temperature. For example, you could display a visual alert or send a notification to your phone.
For more on setting up alerts and notifications, check out this tutorial on Python notifications.
8. Is it safe to use a Raspberry Pi in my car?
Yes, it is generally safe to use a Raspberry Pi in your car. However, make sure the Raspberry Pi and all components are securely mounted and that there’s no exposure to moisture or extreme temperatures. Using a protective case for the Raspberry Pi can help avoid damage.
Learn more about Raspberry Pi in automotive environments at https://www.raspberrypi.org/blog/.
9. Can I connect additional sensors to the Raspberry Pi for more data?
Yes, you can connect additional sensors, such as temperature sensors, GPS modules, or accelerometers, to your Raspberry Pi. This will allow you to collect more data and enhance your smart dashboard system.
Explore sensor integration tutorials on Raspberry Pi at https://www.raspberrypi.org/documentation/.
10. Will I need internet connectivity for this smart car dashboard?
For basic functionalities like reading data from the OBD-II adapter and displaying it, no internet connection is needed. However, if you want to add features like cloud storage, remote monitoring, or GPS-based functionalities, you’ll need an internet connection.
For more on connecting Raspberry Pi to the internet, visit https://www.raspberrypi.org/documentation/networking/.
Did you find this helpful? If you did, please share and stay tuned to our blog!!

