Learn to configure the Raspberry Pi, connect a camera, capture face images, and implement recognition with real-time alerts, all while enhancing your skills in computer vision.
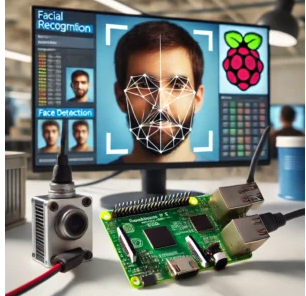
Facial recognition has rapidly evolved from being an exclusive technology to a practical, affordable solution for everyday use. Leveraging the processing power of Raspberry Pi 5 and the capabilities of OpenCV, you can create a robust facial recognition system for home or workspace security. This project empowers you to identify faces, send alerts, and control access effectively.
The Raspberry Pi 5’s upgraded hardware enables real-time processing, making it ideal for facial recognition tasks. When paired with OpenCV’s computer vision tools, the combination offers flexibility, affordability, and precision. Unlike commercial security systems, this DIY solution is customizable to suit specific needs.
This detailed guide explores every aspect of building your system. From setting up hardware to writing Python code for detection and recognition, you will gain the knowledge to deploy a functional and expandable security solution. By enhancing its capabilities, such as integrating a database or enabling remote alerts, you can adapt the system for advanced use cases.
Why Choose Raspberry Pi 5 and OpenCV?
The Raspberry Pi 5’s cutting-edge hardware makes it a prime choice for facial recognition applications. Its powerful processor supports real-time image processing, and its increased memory and improved I/O capabilities make it a robust platform for handling high-resolution data.
Key Benefits:
- Affordability: Raspberry Pi 5 is significantly less expensive than commercial systems, allowing for budget-friendly setups.
- Flexibility: OpenCV offers a range of tools for face detection, recognition, and image processing.
- Customizability: Users can tailor the system for specific security needs, such as multi-user environments or specific alert thresholds.
- Real-Time Performance: The upgraded hardware ensures the system processes data without delays.
- Scalability: The modular design allows for the easy addition of features, such as object detection or gesture recognition.
Using OpenCV with Raspberry Pi 5 combines affordability and power, making this project accessible to hobbyists, students, and professionals alike.
Essential Components for Your System
A successful facial recognition system requires thoughtful selection of components. Here are the essentials:
- Raspberry Pi 5: The central processor for capturing and analyzing images.
- Camera Module: Either the Pi Camera Module or a USB-compatible camera for capturing input.
- MicroSD Card (32GB or higher): For storing the operating system, software, and image data.
- Power Supply: A stable USB-C power source to ensure reliable performance.
- OpenCV Library: The primary tool for implementing computer vision features.
- Display (Optional): For monitoring live video and recognition results.
- Speaker or Buzzer (Optional): To signal unauthorized access attempts.
- Additional Accessories: Relays, lights, or external sensors for expanding functionality.
Step 1: Setting Up Raspberry Pi 5
1. Install Raspberry Pi OS:
Download Raspberry Pi OS from the official website and flash it onto your microSD card using tools like Balena Etcher. Boot up the Pi, and complete the initial configuration.
2. Update System Software:
Ensure your system is up to date to avoid compatibility issues. Run:
3. Install OpenCV:
Install OpenCV, which provides tools for image processing and face recognition. Install necessary libraries:
Clone the OpenCV repository and build it:
Step 2: Setting Up and Testing the Camera
- Connect the Camera Module: Attach the Pi Camera Module or connect a USB camera.
- Enable the Camera:
Navigate to
Interfacing Optionsand enable the camera. - Test Camera Functionality:
Capture a test image to verify the setup:
Step 3: Preparing Images for Recognition
- Organize Data Storage:
Create directories to store known face images: - Capture Training Data:
Capture multiple images of each subject for accurate training: - Preprocess Images:
Resize and convert images to grayscale for efficient processing using OpenCV tools.
Step 4: Writing the Python Code
1. Import Libraries:
2. Load and Train Data:
Use OpenCV’s LBPH algorithm for training:
3. Define Face Detection Function:
4. Real-Time Recognition:
