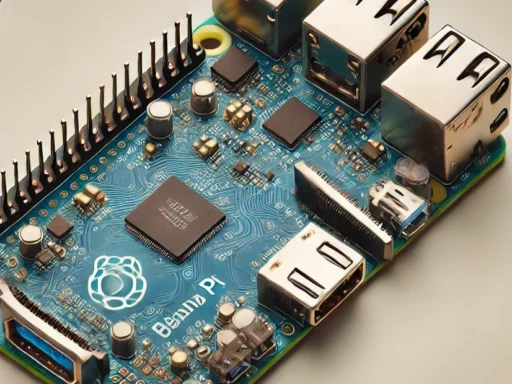
Upgrade your LED wall clock using a Raspberry Pi Pico for enhanced features and functionality in this step-by-step guide.
LED Wall Clock Upgrade
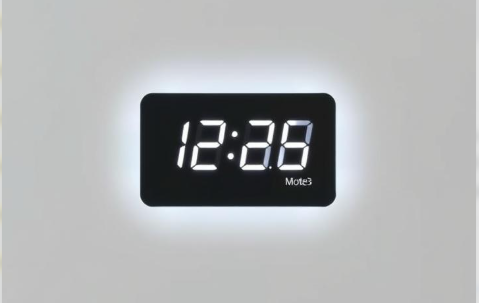
LED wall clocks are visually striking, offering clear readability and style to any space. The LED display technology ensures that the clock can be seen from a long distance, even in dimly lit rooms. However, despite their visual appeal, many standard LED clocks are limited to basic timekeeping functions.
The Raspberry Pi Pico is a powerful yet affordable microcontroller that can be used to enhance the functionality of your LED clock. Its small size, low cost, and programmable features make it ideal for projects like this one. The Pico uses the RP2040 chip, a dual-core processor that enables efficient management of multiple tasks simultaneously. With the Pico, we can integrate features such as accurate timekeeping through the use of a Real-Time Clock (RTC) module, the ability to adjust LED brightness, and the potential for internet synchronization for precise time.
By the end of this project, you’ll have a custom, functional LED wall clock with advanced features powered by the Raspberry Pi Pico.
Understanding the Components and Tools Required
Before diving into the actual building process, it’s important to familiarize yourself with the components and tools required for this project. Below is a summary of the essential items:
| Component | Purpose |
|---|---|
| Raspberry Pi Pico | Microcontroller to control the clock’s features |
| LED Strips (RGB or White) | Light source for the clock’s display |
| Power Supply | Powers the Raspberry Pi Pico and LEDs |
| Real-Time Clock (RTC) Module | Ensures accurate timekeeping |
| Wires and Connectors | Used to connect components |
| Soldering Kit | For secure component connections |
| Micro-USB Cable | Powers the Raspberry Pi Pico |
| Software (Thonny or VS Code) | Used to write and upload code to the Pico |
Tools Needed
In addition to the components listed, you will need a soldering iron, wire cutters, a multimeter for checking connections, and a computer for programming the Pico.
Setting Up the Raspberry Pi Pico
The first step is to set up the Raspberry Pi Pico for programming. Start by downloading and installing the necessary software on your computer. Thonny is a Python IDE that is beginner-friendly, while Visual Studio Code (VS Code) is a more advanced option for programming.
To install MicroPython on the Pico:
- Download the MicroPython firmware for the Raspberry Pi Pico from the official Raspberry Pi website.
- Press and hold the BOOTSEL button on the Pico, and then connect it to your computer. The Pico will appear as a storage device.
- Copy the MicroPython
.uf2file to the Pico. After copying, it will automatically reboot and be ready to use.
Once the setup is complete, test the Pico by running a simple program that blinks an onboard LED. This will confirm that the board is working and ready for your project.
Building the LED Wall Clock Design
When it comes to the design of your LED clock, the primary goal is to arrange the LEDs in such a way that they form visible numbers and display the time clearly. For simplicity, we will use a 7-segment display configuration or RGB LED strips.
Key Considerations:
- LED Strips: These can be purchased in flexible rolls that allow easy shaping and fitting to the clock’s outline.
- 7-segment LEDs: This is another option, where each segment of a number is displayed using an individual LED, ideal for digital clocks.
- LED Colors: RGB LEDs allow flexibility to change the color of the digits.
Connect the LEDs to the Raspberry Pi Pico through jumper wires or a breadboard. You will need a power supply that matches the voltage and current required by your LEDs. The typical voltage for an individual LED is 3.3V or 5V, depending on the type of LED used.
Connecting the RTC Module for Accurate Timekeeping
The RTC module, such as the DS3231, is a crucial component that helps maintain accurate time even when the Pico is powered off. This module uses I2C communication, which allows it to easily interface with the Raspberry Pi Pico.
To connect the RTC module to the Pico, follow these steps:
- Connect the VCC of the RTC to the 3.3V pin on the Pico.
- Connect the GND of the RTC to the GND pin on the Pico.
- Connect SDA of the RTC to GPIO 0 on the Pico (this is the default I2C data pin).
- Connect SCL of the RTC to GPIO 1 on the Pico (this is the default I2C clock pin).
Once connected, you will need to install the necessary libraries in your Python IDE to communicate with the RTC module. For this, we will use the machine library for GPIO control and utime for managing time-related functions.
Programming the Raspberry Pi Pico to Control the Clock
Now that the hardware is set up, it’s time to write the Python code to control the LED wall clock. Below is an example of the code you can use to read time from the RTC and display it on the LEDs.
This code reads the current time from the RTC module and prints it out. In a full implementation, you would replace the print statement with code that updates the LED display to reflect the current time.
Testing the LED Wall Clock System
After wiring everything together and writing the code, it’s time to test your system. Start by powering the circuit. The Raspberry Pi Pico should be connected to the LEDs, and the RTC should be properly set up. Watch as the LEDs light up and display the current time.
Make sure the time on the clock is correct. If there are any issues with the display, such as incorrect wiring or power issues, troubleshoot by checking your connections. A multimeter can be helpful in ensuring proper connections.
Adding Advanced Features to the LED Wall Clock
Once you have the basic clock working, you can add a variety of advanced features. These include:
- Brightness Control: You can implement PWM (Pulse Width Modulation) to adjust the brightness of the LEDs based on the time of day. For example, you can dim the display during nighttime.
- Internet Time Sync: If you want the clock to sync with an internet time server, you can add a Wi-Fi module (like the ESP8266 or ESP32) and use NTP (Network Time Protocol) to sync the clock automatically.
- Temperature Display: Using a sensor like the DHT11 or DHT22, you can display the room temperature along with the time.
Example code for adjusting brightness with PWM:
Finalizing the Project and Installing the Clock
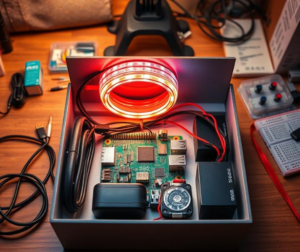
Once all testing is complete and the clock is functioning as expected, it’s time to finalize your project. You can mount the Raspberry Pi Pico and RTC module inside a casing, ensuring that everything is secured. Organize the wiring neatly to avoid any loose connections.
When everything is properly secured, mount the LED display on the wall where you intend to display the clock. Your upgraded LED wall clock is now ready to go!
Troubleshooting Common Issues
Sometimes, even after careful setup, issues might arise. Here are some common problems and their solutions:
| Issue | Solution |
|---|---|
| Clock not displaying time | Check the wiring connections, especially the RTC module |
| LEDs not lighting up correctly | Ensure the power supply is sufficient for the LEDs |
| Incorrect time displayed | Recheck the connections and code for the RTC module |
| Code not running on Pico | Ensure that the correct firmware is installed on the Raspberry Pi Pico |
1. What is the Raspberry Pi Pico and how does it work?
Answer:
The Raspberry Pi Pico is a microcontroller board designed by the Raspberry Pi Foundation. Unlike the Raspberry Pi computers, the Pico doesn’t run a full operating system. Instead, it directly controls hardware through its GPIO (General Purpose Input/Output) pins, making it perfect for embedded projects like this LED wall clock. It uses the RP2040 chip, which features dual-core processing, allowing for efficient handling of multiple tasks simultaneously.
For more information, visit the official Raspberry Pi Pico page:
https://www.raspberrypi.org/products/raspberry-pi-pico/
2. What components do I need to build an LED wall clock with Raspberry Pi Pico?
Answer:
To build the LED wall clock, the basic components needed are:
- Raspberry Pi Pico (microcontroller to control the clock’s functions)
- LED strips (RGB or white LEDs to display the clock’s time)
- Real-Time Clock (RTC) module (like the DS3231 for accurate timekeeping)
- Power supply (for the Raspberry Pi Pico and LEDs)
- Connecting wires and breadboard (for prototyping)
You may also need a soldering kit, jumper wires, and a computer to program the Pico.
For more information on components, check out:
https://www.raspberrypi.org/documentation/pico/getting-started/
3. How do I install MicroPython on the Raspberry Pi Pico?
Answer:
To install MicroPython on your Raspberry Pi Pico, follow these steps:
- Download the MicroPython firmware from the official Raspberry Pi website.
- Press and hold the BOOTSEL button on the Pico and connect it to your computer. This will mount the Pico as a storage device.
- Copy the MicroPython
.uf2file onto the Pico. - After copying, the Pico will reboot, and MicroPython will be installed.
You can then use an IDE like Thonny or VS Code to write Python code for your project.
For more details, refer to:
https://www.raspberrypi.org/documentation/pico/getting-started/
4. Can I use any type of LED for the clock project?
Answer:
While you can use any type of LED, it’s recommended to use RGB LED strips or 7-segment LED displays for creating an easily readable clock. RGB LEDs provide the flexibility to change colors, which can be useful for adding aesthetic effects. The 7-segment displays, on the other hand, are great for clear digit representation. Make sure that the LEDs you choose can handle the power requirements of your circuit.
For LED options, check out:
https://www.adafruit.com/category/168
5. How do I connect a Real-Time Clock (RTC) module to the Raspberry Pi Pico?
Answer:
To connect an RTC module (such as the DS3231) to your Raspberry Pi Pico:
- Connect the VCC and GND pins from the RTC module to the 3.3V and GND pins on the Pico.
- Connect the SDA (data) and SCL (clock) pins from the RTC module to the corresponding I2C pins on the Pico (GPIO 0 for SDA and GPIO 1 for SCL).
- You’ll need to install the
machineandutimelibraries to interface with the RTC in your Python code.
For detailed instructions, visit:
https://www.pico.raspberrypi.org/docs/
6. What software do I need to program the Raspberry Pi Pico?
Answer:
You can program the Raspberry Pi Pico using Python with MicroPython. The best software tools to use are:
- Thonny IDE: A beginner-friendly Python IDE for writing and uploading code to the Pico.
- Visual Studio Code (VS Code): A more advanced option for writing code, with various extensions to aid in development.
Both can be downloaded and set up for free.
For more information on installing these IDEs, refer to:
https://www.raspberrypi.org/documentation/pico/getting-started/
7. How can I adjust the brightness of the LED display?
Answer:
To adjust the brightness of your LED display, you can use Pulse Width Modulation (PWM). This technique allows you to control the brightness by varying the width of the pulse sent to the LEDs. In Python, you can use the machine.PWM function to control the PWM on specific GPIO pins, which are connected to the LEDs.
For more details on controlling PWM with Raspberry Pi Pico, check out:
https://www.raspberrypi.org/documentation/pico/programming-guides/
8. How can I sync the LED wall clock with internet time?
Answer:
To sync your LED wall clock with internet time, you will need to connect the Raspberry Pi Pico to the internet. While the Pico itself doesn’t have Wi-Fi, you can use a Wi-Fi module such as the ESP8266 or ESP32 to provide network connectivity. Using Python libraries like ntplib, you can query an NTP (Network Time Protocol) server to fetch the current time.
Learn more about syncing with NTP here:
https://learn.adafruit.com/esp8266-time/
9. Can I add more features like alarms or a temperature display?
Answer:
Yes, you can add a variety of features to your LED wall clock. For example:
- Alarms: You can set up alarms using the RTC module, and program the Pico to trigger an event (like turning on an LED or sending a notification).
- Temperature Display: By adding a temperature sensor like the DHT11 or DHT22, you can display real-time temperature readings alongside the clock.
For tutorials on adding alarms and temperature sensors, visit:
https://learn.adafruit.com/dht-humidity-sensing-on-raspberry-pi
10. How do I troubleshoot my LED wall clock if it isn’t working?
Answer:
Common issues include:
- Clock not displaying time: Check the wiring between the Raspberry Pi Pico and the RTC module. Ensure I2C communication is working.
- LEDs not lighting up: Verify that the power supply is sufficient and that the LEDs are correctly connected.
- Incorrect time displayed: Double-check your code to ensure the RTC module is correctly initialized and reading the time.
For troubleshooting tips, refer to the Raspberry Pi forums:
https://www.raspberrypi.org/forums/

