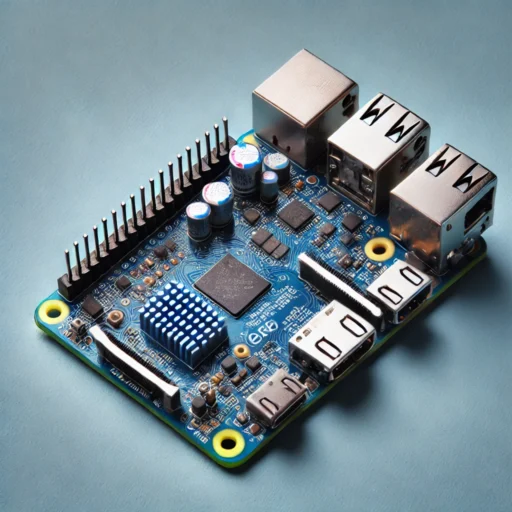
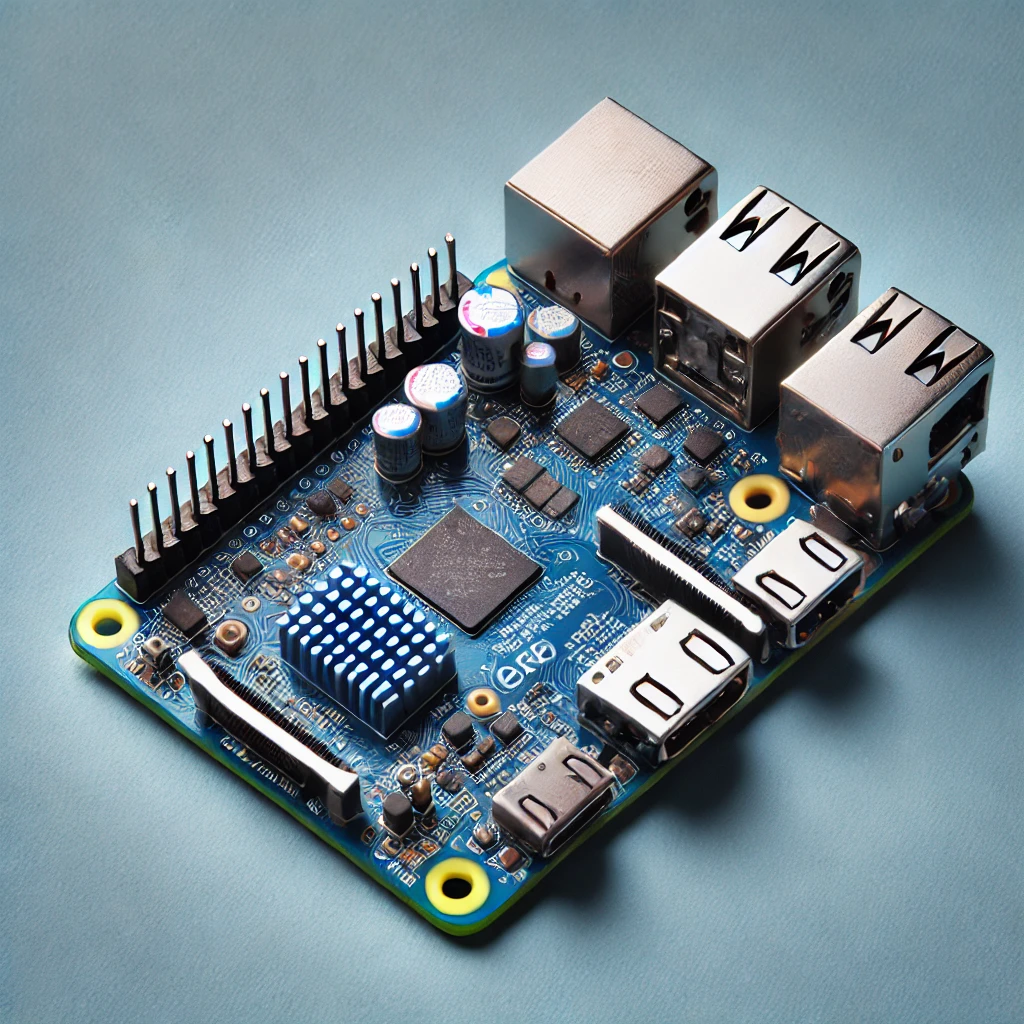
Banana Pi, a powerful and flexible single-board computer, has become a favorite choice for many tech enthusiasts and makers. With its compact size, impressive processing power, and versatility, it offers endless opportunities to create and innovate. Whether you’re an experienced maker or a beginner, Banana Pi can be the foundation for a wide variety of fun and educational projects.
This article delves into the top 10 projects you can try with Banana Pi, designed to suit various skill levels. These projects will not only help you learn new technical skills but also provide hands-on experience with the vast potential of single-board computing. From building home automation systems to crafting your own personal media center, there’s a project for everyone. Let’s dive in!
1. Home Automation System with Banana Pi
Home automation has become increasingly popular as smart homes provide convenience, security, and energy efficiency. With Banana Pi, creating your own automation system is a rewarding project that introduces you to IoT (Internet of Things) concepts.
Step 1: Choose Your Platform
First, you need to choose an automation platform that works well with Banana Pi. Two of the most popular options are OpenHAB and Home Assistant. Both are open-source platforms that allow you to control various devices in your home, from lights and thermostats to security cameras and locks.
Step 2: Set Up the Operating System
Install an operating system such as Armbian on your Banana Pi, which is optimized for ARM-based devices. Make sure the OS supports the platform you’ve chosen. Once installed, ensure your Banana Pi is connected to the internet and can communicate with other smart devices.
Step 3: Install the Home Automation Software
Install OpenHAB or Home Assistant through the terminal by following the installation guides available on their websites. OpenHAB, for example, can be installed via packages, while Home Assistant runs on Docker, which might be more complex but offers flexibility.
Step 4: Add Devices
Now it’s time to add your smart devices to the system. These could be bulbs, thermostats, or cameras that support standard communication protocols such as Zigbee, Z-Wave, or Wi-Fi. Depending on the system, you may need to install additional integration plugins.
Step 5: Automate Actions
Once your devices are added, you can begin creating rules or automation scripts. For instance, you could set the lights to turn on when motion is detected or schedule the thermostat to lower at night to save energy. This step lets you customize your home automation system.
Step 6: Create a User Interface
Home automation software usually comes with a web interface or mobile app to control everything. Set up the user interface on your smartphone or tablet so you can manage your smart home from anywhere. Customize it with tiles and widgets for easier access to critical features.
Step 7: Test and Expand
Test all automation systems to ensure they work as expected. Once you’re satisfied, expand your system by adding more devices or advanced functionality like voice control using platforms like Google Assistant or Amazon Alexa.
By completing this project, you’ll gain valuable experience in home automation, networking, and IoT technologies.
2. Personal Web Server with Banana Pi
Setting up a personal web server is a great way to host your website, blog, or even a file-sharing server directly from your own home. Using Banana Pi as your server platform offers complete control over your content.
Step 1: Install the Operating System
Start by installing an appropriate operating system on your Banana Pi. A lightweight OS such as Armbian or Raspbian is recommended. After installation, ensure your Banana Pi is connected to the network with a static IP address to maintain a stable connection.
Step 2: Install the Web Server Software
You will need to install web server software like Apache or Nginx. Apache is the most widely used web server, but Nginx is known for its speed and lower resource usage. To install Apache on your Banana Pi, simply use the command sudo apt-get install apache2 in the terminal.
Step 3: Set Up PHP and MySQL
To create dynamic content such as blogs or websites with a database, you’ll need to install PHP and MySQL. Install PHP by running sudo apt-get install php libapache2-mod-php. Similarly, install MySQL with sudo apt-get install mysql-server for storing and managing your content.
Step 4: Configure Your Web Server
Once installed, configure your web server to ensure it works as expected. You’ll need to edit configuration files (e.g., httpd.conf for Apache) to adjust settings like server name, document root, and directory permissions.
Step 5: Install WordPress (Optional)
For beginners, installing a Content Management System (CMS) like WordPress simplifies the website creation process. You can install WordPress by downloading it from its official website, extracting the files into the web server’s root directory, and running the installation script.
Step 6: Secure Your Web Server
To ensure your web server is secure, consider installing an SSL certificate. This encrypts data transmitted between the server and your visitors. You can also set up a firewall (using ufw or iptables) to block unauthorized access and mitigate common security threats.
Step 7: Access Your Server
Test your web server by accessing it via the Banana Pi’s IP address from a web browser. Once your website is up and running, you can connect to it from any device on the network. To allow remote access, set up port forwarding on your router or use dynamic DNS services.
Building a personal web server with Banana Pi not only gives you practical experience with server management but also provides a platform for experimentation and web hosting.
3. Retro Gaming Console
If you’re a fan of retro gaming, transforming your Banana Pi into a gaming console is a fun and nostalgic project. By using the right software and hardware, you can emulate classic games from consoles like the NES, SNES, and Sega Genesis.
Step 1: Install RetroPie
RetroPie is the go-to software for creating retro gaming consoles. Start by installing RetroPie on your Banana Pi. Download the RetroPie image compatible with ARM-based devices like Banana Pi and use software like Balena Etcher to flash it onto an SD card.
Step 2: Connect Controllers
Plug in your USB or Bluetooth game controllers. RetroPie supports a wide variety of controllers, including Xbox, PlayStation, and generic USB controllers. Follow the prompts to configure your controller during the initial RetroPie setup.
Step 3: Add ROMs
After setting up RetroPie, you’ll need to add game ROMs to the system. These are the digital versions of the games you want to play. ROMs can be sourced from various online archives, but make sure to check for copyright regulations. Transfer the ROM files to your Banana Pi using FTP or a USB stick.
Step 4: Configure Emulator Settings
RetroPie supports a range of gaming consoles, and each one has its specific emulator settings. Customize the settings for each emulator, adjusting video, audio, and controller configurations to suit your preferences.
Step 5: Launch and Play
Once everything is set up, navigate through the RetroPie interface to select your game. You can also customize the user interface with themes and visual enhancements for a more immersive experience.
Step 6: Set Up External Storage
If your ROM collection grows, you might want to use external storage. Connect a USB flash drive or external hard drive to your Banana Pi and configure RetroPie to use it as additional storage for games and save files.
Step 7: Expand with Multiplayer
For added fun, set up local multiplayer games with friends or even enable online multiplayer via RetroPie’s network options. RetroPie supports multiplayer emulation, allowing you to play classic games like Street Fighter or Mario Kart with others.
Creating a retro gaming console is an excellent way to enjoy classic games while learning about emulation, hardware, and configuring gaming systems.

4. DIY Media Center
Transform your Banana Pi into a powerful media center for streaming movies, shows, music, and more. A DIY media center brings convenience and entertainment to your home, all while using open-source software.
Step 1: Install Kodi or Plex
The first step in creating your media center is installing Kodi or Plex. Kodi is a free, open-source media player that offers powerful streaming capabilities. Plex is also a popular choice, providing additional features such as remote streaming and cloud synchronization.
Step 2: Configure Media Libraries
Once you’ve installed your preferred media software, start organizing your media library. You can add movies, TV shows, music, and photos stored locally or stream content from network shares or the internet.
Step 3: Set Up Streaming Services
For online streaming, configure services such as YouTube, Netflix (via a third-party app), and other platforms. Most media center software has built-in plugins or add-ons for accessing streaming content.
Step 4: Connect to Your TV
Connect your Banana Pi to a TV or monitor using HDMI. You’ll want to adjust the display settings for optimal resolution and screen size to get the best viewing experience.
Step 5: Control Your Media Center
Set up remote control for your media center. You can use a physical remote, a smartphone app, or even voice commands if integrated with Google Assistant or Amazon Alexa.
Step 6: Manage External Storage
For a larger media library, consider adding an external hard drive or NAS to your Banana Pi setup. Use Samba or NFS to access network shares and increase the amount of media content you can stream.
Step 7: Enhance with Add-Ons
Enhance your media center by adding useful add-ons. You can install weather apps, news feeds, and even games to make your media center more interactive.
With a DIY media center, you can enjoy your favorite content on any screen, all while learning about media streaming and system integration.
5. AI-Powered Face Recognition System
Face recognition systems are increasingly popular for security and identification. With Banana Pi, you can create your own AI-powered face recognition system that can track faces and even recognize authorized users.
Step 1: Set Up Dependencies
Start by installing essential libraries for computer vision, such as OpenCV, dlib, and TensorFlow. These tools are key to building the recognition system. Use Python to write the scripts that will handle face detection and recognition.
Step 2: Capture Training Data
To train your face recognition model, you’ll need to capture images of faces. Use a camera connected to your Banana Pi to take several pictures of individuals from different angles and lighting conditions.
Step 3: Train the Model
Once you’ve captured enough data, you can begin training the face recognition model. Use a Python script that processes the images and uses algorithms like Haar Cascades or deep learning models to detect facial features.
Step 4: Implement Real-Time Detection
After training your model, implement real-time face detection. Connect a webcam to the Banana Pi and configure the system to detect faces in real-time through the camera feed.
Step 5: Create a Recognition System
Once faces are detected, the next step is recognition. Store the captured faces in a database and use machine learning techniques to match incoming faces to the ones in the database. When a recognized face is detected, the system can trigger an action like sending an alert or logging access.
Step 6: Test and Optimize
Test your face recognition system in various lighting conditions and environments. Adjust the model for better accuracy by tweaking its parameters or training it on additional images.
Step 7: Secure the System
To enhance security, integrate additional layers such as password protection or a multi-factor authentication system. This adds another layer of defense to the face recognition process.
Building a face recognition system with Banana Pi provides valuable experience in AI, machine learning, and computer vision.
6. Network-Attached Storage (NAS)
Setting up a NAS using Banana Pi is a great way to create a centralized storage solution for all your files, accessible from multiple devices.
Step 1: Install OpenMediaVault
Start by installing OpenMediaVault, a popular open-source NAS software. OpenMediaVault can be installed directly on Banana Pi and configured through a web interface.
Step 2: Connect Storage Devices
Next, connect external hard drives or USB flash drives to your Banana Pi. OpenMediaVault supports various types of storage devices, and you can configure them to be shared across your network.
Step 3: Configure Network Shares
Once your storage devices are connected, create shared folders on OpenMediaVault. You can set up SMB, NFS, or FTP shares depending on your needs. Ensure proper permissions are set for file access.
Step 4: Set Up Remote Access
If you need access to your NAS from outside your home network, configure VPN access or enable FTP/SFTP access. This allows secure remote connections to your files.
Step 5: Set Up Backup and Redundancy
Configure backup solutions to protect your data. OpenMediaVault allows you to schedule automatic backups to another device or cloud service. Additionally, you can implement redundancy with RAID configurations to prevent data loss in case of a hard drive failure. This ensures that your files are safe and accessible even if one of your storage devices encounters an issue.
Step 6: Manage User Access
To control who can access your NAS, you can create user accounts and assign permissions based on specific folders. For example, family members may have access to certain folders, while others remain private. OpenMediaVault offers detailed access controls to make sure only authorized users can modify files or settings.
Step 7: Monitor and Maintain the NAS
Regularly check the health of your hard drives and monitor network activity using OpenMediaVault’s built-in monitoring tools. Set up email notifications to alert you if there are any issues, such as disk failure or network downtime, so you can take action before any serious problems arise.
Creating a NAS with Banana Pi is an excellent way to learn about storage solutions, network configurations, and data redundancy while providing you with a reliable and scalable solution for managing your files.
7. Surveillance Camera System
A surveillance system provides a powerful way to monitor and secure your home or office. By using Banana Pi as the central hub for your security cameras, you can build a custom surveillance system tailored to your needs.
Step 1: Choose Your Camera System
Choose whether you want to use IP cameras or USB webcams for your surveillance system. IP cameras can be connected to your network, while USB cameras will need to be connected directly to your Banana Pi via USB ports.
Step 2: Install MotionEyeOS
MotionEyeOS is a popular surveillance software that works well with Raspberry Pi and Banana Pi. Install MotionEyeOS on your Banana Pi by downloading the image and flashing it to an SD card. This software provides a web-based interface to manage your camera system.
Step 3: Configure Camera Settings
Once MotionEyeOS is installed, you can configure your cameras through its web interface. Set up motion detection, video streaming, and recording options. You can configure each camera with different settings depending on your preferences, such as adjusting sensitivity for motion detection.
Step 4: Set Up Remote Viewing
To view your surveillance cameras remotely, configure port forwarding on your router or use a dynamic DNS service. This allows you to access your live feed from anywhere using a smartphone or computer.
Step 5: Enable Alerts and Notifications
Set up alerts to notify you when motion is detected or when a camera goes offline. MotionEyeOS can send email or push notifications to keep you informed in real-time about any suspicious activity.
Step 6: Implement Video Storage
Store video footage on local storage such as an external hard drive or network share. MotionEyeOS allows you to configure where to save video recordings and manage the storage space. You can also set up automatic deletion of old footage to free up space.
Step 7: Test and Optimize
Once everything is set up, test your camera system by triggering motion detection and ensuring that alerts are received. Check video quality, recording settings, and remote access to make sure everything is functioning as expected. Fine-tune settings for optimal performance.
Building a surveillance system with Banana Pi is a practical project that enhances your security while teaching you about camera networks, video streaming, and motion detection software.
8. Voice Assistant System
Voice assistants like Amazon Alexa and Google Assistant are common in many smart homes, but building your own custom voice assistant with Banana Pi offers a fun challenge and gives you full control over the features and functions.
Step 1: Install an Assistant Framework
To begin, choose a voice assistant framework like Mycroft, which is an open-source alternative to commercial voice assistants. Install Mycroft on your Banana Pi by following the installation guide available on their website. Mycroft uses natural language processing (NLP) to process commands and interact with you.
Step 2: Connect a Microphone and Speaker
For the voice assistant to work, you’ll need to connect a microphone and speaker to your Banana Pi. USB microphones and speakers are plug-and-play and will work well for most setups. Ensure that the audio input and output are correctly configured.
Step 3: Configure the Voice Assistant
Once installed, configure Mycroft or your chosen voice assistant software. Set up wake words (e.g., “Hey Mycroft” or “Okay Banana”) so that the assistant can listen for your commands. You can also personalize responses and functionality to suit your needs, such as adding weather forecasts or setting reminders.
Step 4: Add Skills and Integrations
Enhance the capabilities of your voice assistant by adding skills or integrating it with other platforms like smart home systems, music services, or online databases. Skills can be installed from Mycroft’s marketplace, or you can write your own custom skills.
Step 5: Set Up Voice Recognition
To improve user experience, configure voice recognition features. This will allow your assistant to recognize multiple users and provide personalized responses. You can also adjust the assistant’s language preferences or accents for a better fit.
Step 6: Test and Optimize
After everything is set up, test your voice assistant by asking it to perform various tasks, such as answering questions, playing music, or controlling smart devices. Fine-tune the system to recognize commands more accurately and ensure smooth interaction.
Step 7: Expand and Customize
Once your basic voice assistant is up and running, you can expand it further by adding more advanced features. You can connect it to your home automation system, build custom skills, or integrate it with other voice assistants like Google Assistant or Alexa.
Building a voice assistant with Banana Pi is an exciting project that teaches you about voice recognition, AI, and automation, all while providing a practical tool for your home.
9. Smart Mirror
A smart mirror displays useful information like weather forecasts, time, and calendar events while functioning as a regular mirror. It’s a sleek addition to any home, combining technology and practicality.
Step 1: Install MagicMirror Software
Start by installing MagicMirror, an open-source software platform for building smart mirrors. Download the MagicMirror software and install it on your Banana Pi. MagicMirror has a modular design, allowing you to add various modules like weather, news, or personal reminders.
Step 2: Set Up the Display
Connect a monitor or touchscreen to your Banana Pi and mount it behind a two-way mirror. The mirror reflects your image, while the display behind it shows the information from the MagicMirror software. Adjust the brightness and contrast settings for optimal visibility.
Step 3: Install Modules
MagicMirror allows you to install a variety of modules that display different types of information. Common modules include weather, calendar events, and news feeds. You can install and configure these modules based on your needs.
Step 4: Customize the Layout
Customize the layout of your smart mirror by adjusting the arrangement of modules. For example, you might want to display the weather at the top, followed by the time and calendar below. MagicMirror’s configuration file allows for easy customization.
Step 5: Add Voice Control
For an added touch of interactivity, you can add voice control to your smart mirror. Integrate it with a voice assistant like Mycroft or Google Assistant to enable voice commands for checking the weather or adding calendar events.
Step 6: Power Management
Consider setting up automatic on/off control for your smart mirror, so it only turns on when someone is nearby. You can use motion sensors or schedule it to power on and off at specific times of day.
Step 7: Test and Fine-Tune
After completing the installation and customization, test the smart mirror to make sure everything functions as expected. Check the visibility, responsiveness of touchscreens, and accuracy of displayed data. Fine-tune the settings as needed for optimal performance.
Building a smart mirror with Banana Pi is a fun project that combines hardware and software engineering, allowing you to create a sleek, functional device for your home.
10. AI-Powered Plant Monitoring System
This project uses AI to monitor the health of your plants by measuring factors like soil moisture, temperature, and light levels. It’s an ideal project for learning about sensors, data analysis, and automation.
Step 1: Set Up the Sensors
First, you’ll need to gather the necessary sensors for soil moisture, temperature, and light levels. These sensors are easily connected to your Banana Pi through GPIO pins. You can use affordable options like the DHT22 for temperature and humidity and the LDR for light intensity.
Step 2: Install Python Libraries
Install the required Python libraries to interact with the sensors. Libraries like RPi.GPIO or Adafruit’s Python DHT module will allow you to gather sensor data. Set up the sensors and test them to ensure they’re working correctly.
Step 3: Collect Data
Write a Python script to collect data from the sensors at regular intervals. The script will log the soil moisture, temperature, and light levels, and store the data in a database or a CSV file for further analysis.
Step 4: Build the AI Model
Use machine learning algorithms, like decision trees or neural networks, to analyze the data and predict plant health. For example, if the soil moisture is low and the temperature is high, the AI can recommend watering the plant.
Step 5: Display Results
Set up a web interface to display the sensor data and AI recommendations. You can use frameworks like Flask or Django to create a simple web app that shows real-time data and suggestions for plant care.
Step 6: Send Alerts
Create a notification system that sends alerts to your phone if the plant needs attention, such as when the soil is too dry or the temperature is too high. You can use services like Twilio to send SMS or push notifications.
Step 7: Optimize and Test
Once everything is set up, test the system by monitoring a plant and adjusting the environmental conditions. Fine-tune the AI model and sensor settings to ensure accurate recommendations.
Building an AI-powered plant monitoring system with Banana Pi allows you to integrate machine learning with hardware, creating a useful system for plant care while learning valuable skills in programming and AI.
These projects showcase the versatility of Banana Pi in various areas, from home automation to security systems and even AI. By completing these projects, you’ll gain a deeper understanding of both hardware and software, and you’ll be able to build custom solutions tailored to your needs.