Introduction to Building a Cloud Weather Station
Weather stations play a vital role in a wide range of industries, including agriculture, meteorology, and home automation. With the advent of the Internet of Things (IoT), building your own weather station has become more accessible and cost-effective. In this guide, we’ll walk you through creating a cloud-based weather station using the ESP32 or ESP8266 microcontroller, along with MySQL and PHP to collect, store, and display weather data.
The ESP32 and ESP8266 are both low-cost, Wi-Fi-enabled microcontrollers, making them ideal for IoT projects. These boards allow you to read data from sensors such as temperature, humidity, barometric pressure, and more, and then upload that data to a cloud-based server. Using MySQL as a database, you can store this weather data, and PHP will handle the web interface to display the data to users in real time.
By the end of this tutorial, you’ll have a fully functional weather station that monitors environmental conditions and sends the data to the cloud. This project will not only help you learn about hardware and software integration, but it will also give you hands-on experience with cloud computing and web development.
What You’ll Need
Before diving into the project, it’s important to gather all the necessary components. The hardware is relatively inexpensive, and the software tools are free to use. Below is a list of everything you’ll need to build the cloud weather station:
Hardware Requirements:
-
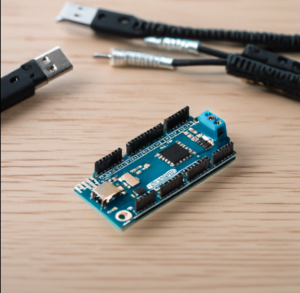
ESP32 or ESP8266 Board: These microcontrollers are the core of your weather station. The ESP32 is more powerful and comes with Bluetooth capabilities, while the ESP8266 is smaller and may be better suited for less demanding projects. Both are excellent choices for IoT applications, thanks to their onboard Wi-Fi capabilities.
-
DHT22 Sensor: The DHT22 is a commonly used temperature and humidity sensor. It’s inexpensive, easy to use, and provides accurate readings for most weather-related applications. You can also use the DHT11 sensor, but the DHT22 offers a wider range of measurement and higher accuracy.
-
Breadboard and Jumper Wires: You’ll need these to prototype your circuit before making the final connections.
-
Power Supply: You’ll need a power supply that can reliably power your ESP32 or ESP8266. A 5V USB power supply typically works well.
-
Optional Sensors: To make your weather station more advanced, you can add additional sensors:
- BMP180 (Barometric Pressure Sensor) for measuring atmospheric pressure.
- Rain Gauge for monitoring rainfall.
- Light Sensor (e.g., LDR) for monitoring light intensity.
Software Requirements:
-
Arduino IDE: The Arduino IDE is the development environment for programming the ESP32/ESP8266. It supports a variety of microcontrollers and makes it easy to program the ESP32/ESP8266.
-
MySQL Database: A relational database like MySQL is used to store the weather data in a structured format. You’ll need a database to store readings such as temperature, humidity, and pressure, and later retrieve that data for display.
-
PHP: This server-side scripting language will be used to create a web interface to interact with your database. The PHP code will fetch the weather data from MySQL and display it on a webpage.
-
Web Server: You can run the PHP script on your local server using software like XAMPP (a free, open-source cross-platform web server) or host it on a cloud-based server (e.g., AWS or Bluehost).
Setting Up the ESP32/ESP8266
Now that you have your components and software in place, let’s move on to setting up the ESP32 or ESP8266 microcontroller. The setup process involves installing the Arduino IDE, adding the necessary board libraries, and writing the code to interface with your sensors.
Step 1: Install the Arduino IDE
First, if you haven’t already, download and install the Arduino IDE from the official website. It’s a versatile, user-friendly platform for developing code for microcontrollers. The IDE supports a wide range of boards, including the ESP32 and ESP8266.
Step 2: Add ESP32/ESP8266 to Arduino IDE
- Open the Arduino IDE.
- Go to File > Preferences and find the “Additional Boards Manager URLs” field.
- Add the following URL to the field:
- Next, navigate to Tools > Board > Boards Manager, search for ESP32 or ESP8266, and install the relevant package for your board.
Step 3: Connect the ESP32/ESP8266 to Your Computer
Once the IDE is set up and the necessary board packages are installed, connect the ESP32 or ESP8266 to your computer using a micro USB cable. Select the correct board and port in the Tools > Board and Tools > Port menu.
Step 4: Wiring the Sensors
Next, you’ll need to wire the DHT22 sensor to the ESP32/ESP8266. Here’s the connection:
- VCC pin of the DHT22 to 3.3V (or 5V, depending on your board).
- GND pin of the DHT22 to GND.
- Data pin of the DHT22 to a digital pin on the ESP32/ESP8266 (for example, GPIO4 or D2).
Step 5: Code the ESP32/ESP8266
With the hardware connected, it’s time to write some code to collect data from the sensor. Below is an example code that reads temperature and humidity from the DHT22 sensor and prints the values to the Serial Monitor:
This code initializes the DHT22 sensor, reads the temperature and humidity values, and prints them to the Serial Monitor. Once the sensor is working correctly, we’ll move to the next step: sending the data to a MySQL database.
Setting Up MySQL Database
In order to store the weather data, we need to set up a MySQL database. MySQL is a powerful, widely-used relational database management system that will allow you to store data in tables.
Step 1: Install MySQL
If you haven’t installed MySQL yet, you can use XAMPP or MAMP to set up a local server with MySQL support. Alternatively, you can use a cloud-based solution such as AWS RDS or Bluehost.
Step 2: Create a Database
Once MySQL is installed and running, create a database to store the weather data:
Step 3: Create a Table
Next, create a table within the weather_station database to store the temperature, humidity, and timestamp of each reading:
This table will store each weather reading with its corresponding temperature, humidity, and the timestamp of when the reading was taken.
PHP Web Interface to Display Data
To display the data collected by your weather station, you’ll need a web interface. This can be done using PHP and HTML. Below is a simple PHP script that fetches the data from your MySQL database and displays it on a web page.
Step 1: Create a PHP Script
Create a new PHP file (e.g., index.php) and write the following code:
This script connects to the MySQL database, fetches the latest weather data, and displays it on the page.
Step 2: Upload Data to MySQL
Now, you need to modify your ESP32/ESP8266 code to send the sensor data to your PHP script. You’ll send a GET request to the PHP server with the temperature and humidity values.
Here’s a simple example of how you can send the data:
This code connects to WiFi, sends the sensor data to the update.php script, and uploads the data to MySQL.
Building a cloud-based weather station using ESP32/ESP8266, MySQL, and PHP is an excellent project for beginners and advanced enthusiasts alike. By following the steps outlined in this guide, you can create a custom weather station that collects real-time data and stores it in the cloud for easy access and analysis.
Once your station is up and running, you can customize it further by adding more sensors, creating more complex data visualizations, and integrating it with other IoT platforms. The possibilities are endless!
Visit our other website: aibrainpowered.com

