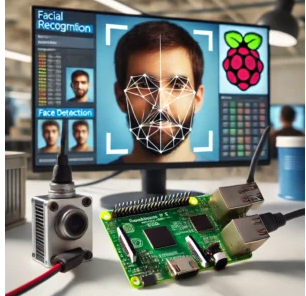
Create a Raspberry Pi-powered smart parking system! Step-by-step guide with coding, sensors, and IoT to manage parking efficiently. Perfect for beginners.
Smart Parking System
Smart cities are reshaping the way we live, and parking management is a critical component. Traditional parking systems often fail to provide real-time data on space availability, leading to frustration for drivers and inefficient use of parking lots. With the versatility and affordability of the Raspberry Pi, you can build your own smart parking system. This project uses sensors to detect vehicles, a Raspberry Pi to process data, and optional IoT integration to monitor spaces remotely.
The Raspberry Pi acts as the brain, interfacing with sensors and displays to provide real-time updates. Ultrasonic sensors monitor parking spots, while an optional camera module enables advanced features like license plate recognition. This project is beginner-friendly yet scalable for more advanced use cases.
By the end of this guide, you’ll have a fully functional parking management system. Whether you’re tackling a school project or solving real-world parking challenges, this is an excellent way to enhance your skills.
Let’s dive into the details, starting with what you’ll need to get started.
Materials Required
To create your smart parking system, you’ll need these components.
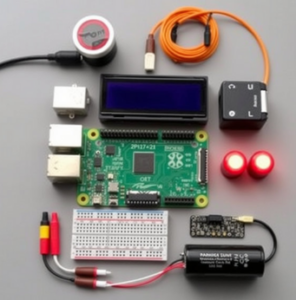
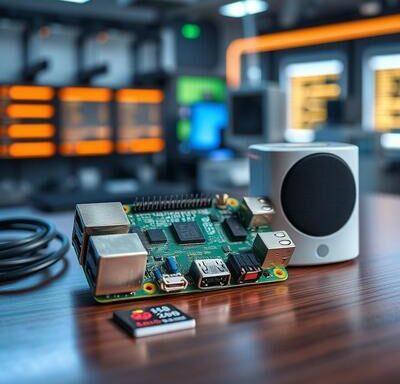
- Raspberry Pi (Model 4 or 3): The central processing unit of the project, it controls sensors, displays, and connectivity.
- Ultrasonic Sensors: These detect the presence of vehicles by measuring distance. Each sensor corresponds to a parking spot.
- Camera Module (Optional): Enables advanced features like monitoring or license plate recognition.
- LCD Display or LED Indicators: Used to show available and occupied spaces. LED lights provide visual indicators for drivers.
- Wi-Fi Module (if not in-built): Facilitates remote access to parking data.
- Power Supply and Battery: Ensures uninterrupted operation of the system.
- Jumper Wires and Breadboard: For connecting components to the Raspberry Pi.
In addition, you’ll need a computer with internet access to write and deploy the necessary Python code. Open-source libraries like OpenCV or MQTT will simplify implementation.
This project can be completed with basic programming knowledge, but familiarity with Python and electronics will make it even easier. Now let’s get the Raspberry Pi ready.
Setting Up Raspberry Pi
Setting up the Raspberry Pi involves installing the operating system and preparing it for coding.
- Install Raspbian OS
Begin by downloading the Raspbian operating system from the official Raspberry Pi website. Use a tool like Balena Etcher to flash the image onto an SD card. Insert the card into the Raspberry Pi and connect it to a display, keyboard, and mouse. Boot the device and follow the initial setup instructions. - Update the System
Keeping your Raspberry Pi up-to-date is crucial. Run these commands in the terminal:bashsudo apt update
sudo apt upgrade
This ensures all software and libraries are current.
- Install Python and Necessary Libraries
The system will rely on Python scripts for sensor data processing and display updates. Install Python and essential libraries using:bashsudo apt install python3 python3-pip
pip3 install RPi.GPIO
- Enable Wi-Fi Connectivity
To use remote monitoring features, connect the Raspberry Pi to Wi-Fi. You can configure this during setup or by editing thewpa_supplicant.conffile. - Test the Setup
Reboot the Raspberry Pi and test its connectivity and functionality. Write a simple Python script to ensure GPIO pins can control external components.
By now, your Raspberry Pi is ready for integration with sensors and other hardware.
Connecting and Coding the Ultrasonic Sensors
Ultrasonic sensors are pivotal for detecting the presence of vehicles. Let’s set them up.
- Position the Sensors
Place the ultrasonic sensors in each parking spot to monitor occupancy. Ensure they are mounted securely and aligned properly for accurate readings. - Connect to GPIO Pins
Using jumper wires, connect the ultrasonic sensors’triggerandechopins to the Raspberry Pi’s GPIO pins. For instance:- Trigger Pin to GPIO 23
- Echo Pin to GPIO 24
- Write the Detection Script
Create a Python script to measure the distance of objects (cars) using the sensors. Here’s an example:pythonimport RPi.GPIO as GPIO
import timeGPIO.setmode(GPIO.BCM)
TRIG = 23
ECHO = 24GPIO.setup(TRIG, GPIO.OUT)
GPIO.setup(ECHO, GPIO.IN)while True:
GPIO.output(TRIG, True)
time.sleep(0.00001)
GPIO.output(TRIG, False)while GPIO.input(ECHO) == 0:
start = time.time()while GPIO.input(ECHO) == 1:
end = time.time()distance = (end - start) * 34300 / 2
print(f"Distance: {distance} cm")
time.sleep(1)
- Calibrate the Sensors
Test the sensors with various objects and calibrate them to detect vehicles reliably. Adjust the distance threshold for better accuracy.
Adding Camera Module for Advanced Features
If you want to integrate a camera for additional functionality like license plate recognition, follow these steps.
- Attach the Camera
Connect the Raspberry Pi camera module to the CSI port and secure it. - Enable the Camera Interface
Open the Raspberry Pi configuration tool:bashsudo raspi-config
Navigate to “Interfacing Options” and enable the camera.
- Install OpenCV
For image processing, install OpenCV:bashsudo apt install python3-opencv
- Write the Detection Script
Use OpenCV to process images from the camera. Here’s an example for motion detection:pythonimport cv2camera = cv2.VideoCapture(0)
while True:
ret, frame = camera.read()
cv2.imshow('Parking Camera', frame)if cv2.waitKey(1) & 0xFF == ord('q'):
breakcamera.release()
cv2.destroyAllWindows()
Setting Up the Dashboard and Indicators
Once the sensors are in place and functional, the next step is to set up a dashboard to display parking data and visual indicators for users. This enhances the usability and provides real-time feedback for drivers and system administrators.
1. Designing the Dashboard Interface
You can use a simple LCD or a more sophisticated touch display to show parking availability. For basic setups:
- An LCD Display (16×2 or 20×4) is connected to the Raspberry Pi via I2C protocol.
- Display “Available Spots” and “Occupied Spots” in real-time.
- If using a web-based dashboard, design a simple interface with HTML and JavaScript. Use Flask or Django on the Raspberry Pi to serve the webpage.
2. Wiring the Indicators
LED indicators provide a clear visual cue for drivers.
- Green LEDs indicate available spots.
- Red LEDs signify occupied spots.
Connect LEDs to GPIO pins and write a Python script to turn them on/off based on sensor readings.
Example script:
import RPi.GPIO as GPIO
green_led = 17

red_led = 27
GPIO.setup(green_led, GPIO.OUT)

GPIO.setup(red_led, GPIO.OUT)
if available_spots > 0:

    GPIO.output(green_led, True)

    GPIO.output(red_led, False)

else:

    GPIO.output(green_led, False)

    GPIO.output(red_led, True)
3. Integrating Real-Time Data
Link sensor data to the dashboard display. For local dashboards, print sensor readings directly. For web dashboards, send data using MQTT or HTTP. Example of sending data:
import requests
requests.post("http://your-dashboard-url.com/update", data={"spots": available_spots})
4. Testing the Indicators and Display
Simulate parking activity by manually triggering sensors and ensure indicators/dashboards update correctly. Debug errors if the LED or display malfunctions.
Enabling IoT for Remote Monitoring
To make the parking system truly smart, integrating IoT features allows remote monitoring and management of parking spaces.
1. Setting Up MQTT or HTTP Communication
For IoT functionality, the system needs to send and receive data. Install MQTT broker (like Mosquitto) or set up an HTTP server on the Raspberry Pi.
For MQTT:
sudo apt install mosquitto mosquitto-clients
Publish parking data to a topic using Python:
import paho.mqtt.client as mqtt
client = mqtt.Client()

client.connect("broker.hivemq.com", 1883, 60)
client.publish("parking/data", "Available: 5")
2. Creating a Cloud Database
Use a cloud platform like Firebase or AWS to store data. For Firebase:
- Create a Firebase project and retrieve API credentials.
- Install Firebase Python SDK:
bash
pip install firebase-admin
- Write data to Firebase:
python
import firebase_admin
from firebase_admin import credentials, dbcred = credentials.Certificate("path/to/your/firebase.json")
firebase_admin.initialize_app(cred, {'databaseURL': 'https://your-database.firebaseio.com'})ref = db.reference('parking')
ref.set({'available_spots': 5})
3. Building a Remote Dashboard
Design a web app to display parking availability globally. Use frameworks like Flask or Django for back-end integration.
4. Securing the IoT System
Ensure the system is secure to prevent unauthorized access:
- Use encrypted communication (e.g., HTTPS or MQTT over TLS).
- Implement API keys for accessing cloud data.
Assembly and Final Touches
The assembly and finalization of your smart parking system are critical to ensuring its functionality and durability. This stage involves combining all components into a cohesive unit, optimizing performance, and preparing the system for deployment.
1. Preparing the Chassis and Housing
Begin by selecting a durable and suitable chassis to house all components.
- Material: Choose a robust material like acrylic, aluminum, or weatherproof plastic to protect your electronics from physical damage and environmental factors.
- Size and Layout: Ensure the chassis has enough room to accommodate the Raspberry Pi, sensors, wires, and power supply. Plan the layout to minimize overlapping wires and ensure proper airflow.
- Drilling and Mounting: Use a drill to create holes for mounting sensors and LEDs. Secure the Raspberry Pi and motor drivers using screws or adhesive mounts.
For outdoor systems, consider using a weatherproof case with a clear panel for LEDs or displays and sealed ports for wiring.
2. Wiring and Connections
After securing all components to the chassis, focus on wiring and connections:
- Sensor Wiring:
- Connect the ultrasonic sensors to their respective GPIO pins on the Raspberry Pi. Use jumper wires to ensure secure connections.
- Label each wire to avoid confusion during troubleshooting.
- LED Indicators: Attach the LED wires to the GPIO pins assigned for status indicators. Use resistors to limit current and prevent damage to the LEDs.
- Power Supply:
- Use a dedicated power source like a 5V power adapter or a LiPo battery pack for the Raspberry Pi.
- Ensure power is stable and meets the voltage and current requirements of all components.
- Soldering: For long-term reliability, solder the connections to a custom PCB or a prototyping board. This minimizes loose connections and improves durability.
3. Assembling the Sensors in the Parking Lot
Position the sensors in the designated parking area:
- Height and Angle: Mount ultrasonic sensors at a height of 1–2 feet from the ground and at a slight downward angle to detect vehicles accurately.
- Spacing: Place the sensors at regular intervals, ensuring coverage for all parking spots.
- Wiring Channels: Use conduit or cable covers to organize and protect wires running across the parking lot.
If you’re including cameras, mount them on poles or walls at an appropriate height to capture clear images of parking spots.
4. Testing the Complete System
Before final deployment, thoroughly test the system to ensure everything functions as expected:
- Sensor Calibration:
- Test each ultrasonic sensor by simulating the presence and absence of vehicles. Adjust the threshold distances in your code if needed.
- LED Indicators: Verify that green LEDs light up when spots are available, and red LEDs illuminate when spots are occupied.
- Dashboard Updates: Check that the data displayed on the local or web-based dashboard updates in real-time as parking spots are occupied or freed.
- Data Transmission: If using IoT, confirm that data is transmitted correctly to cloud servers and is accessible on remote dashboards or apps.
5. Deploying the System in the Parking Lot
Once testing is successful, deploy the system in its designated parking lot:
- Positioning: Place the chassis in a secure, central location with access to a power source.
- Final Connections: Connect all sensors, LEDs, and displays to the Raspberry Pi, ensuring all components are securely mounted.
- Powering Up: Switch on the system and monitor its startup process to confirm smooth operation.
Provide clear signage to inform users about the smart parking system. For instance, display instructions near the entrance, highlighting how the system indicates available spots.
6. Enhancing User Experience
For a more user-friendly system, consider adding advanced features:
- Touchscreen Displays: Replace basic LCDs with touchscreens to allow users to interact with the system, such as reserving parking spots.
- Voice Announcements: Integrate text-to-speech modules to guide users with audio announcements about available parking.
- Notifications: Use IoT features to send SMS or app notifications about parking availability.
7. Ongoing Maintenance and Updates
Finally, schedule regular maintenance to ensure the system operates smoothly:
- Hardware Check: Inspect sensors, LEDs, and wiring for wear or damage.
- Software Updates: Periodically update the Raspberry Pi software and scripts to fix bugs or add new features.
- Log Analysis: Monitor logs from sensors and cloud platforms to identify any issues or inconsistencies.
Proper assembly and final touches not only improve the system’s functionality but also ensure its longevity and user satisfaction. Would you like detailed images or diagrams to complement these instructions?

