Creating a temperature and humidity sensor with Raspberry Pi is a simple yet effective way to monitor your environment. In this guide, you’ll learn how to use the Adafruit Si7021 sensor to measure real-time data, making it perfect for home automation or scientific projects. Let’s dive in and get started!
Materials Needed:
- Raspberry Pi
- Adafruit Si7021 sensor
- Jumper wires
- Breadboard
- Python installed on your Raspberry Pi
You can check out this video tutorial for a visual step-by-step process. (Embed a related YouTube tutorial or a demo of the setup)
Step-by-Step Guide:
1. Setting Up Your Raspberry Pi:
First, ensure your Raspberry Pi is ready by updating the system. Run the following commands in the terminal:
sudo apt-get update

sudo apt-get upgrade
This will keep your software current.
2. Installing Necessary Libraries:
The Adafruit Si7021 sensor communicates via I2C. You will need to install the required Python libraries:
sudo apt-get install python3-smbus

sudo apt-get install i2c-tools

sudo pip3 install adafruit-circuitpython-si7021
This makes your Raspberry Pi capable of reading sensor data.
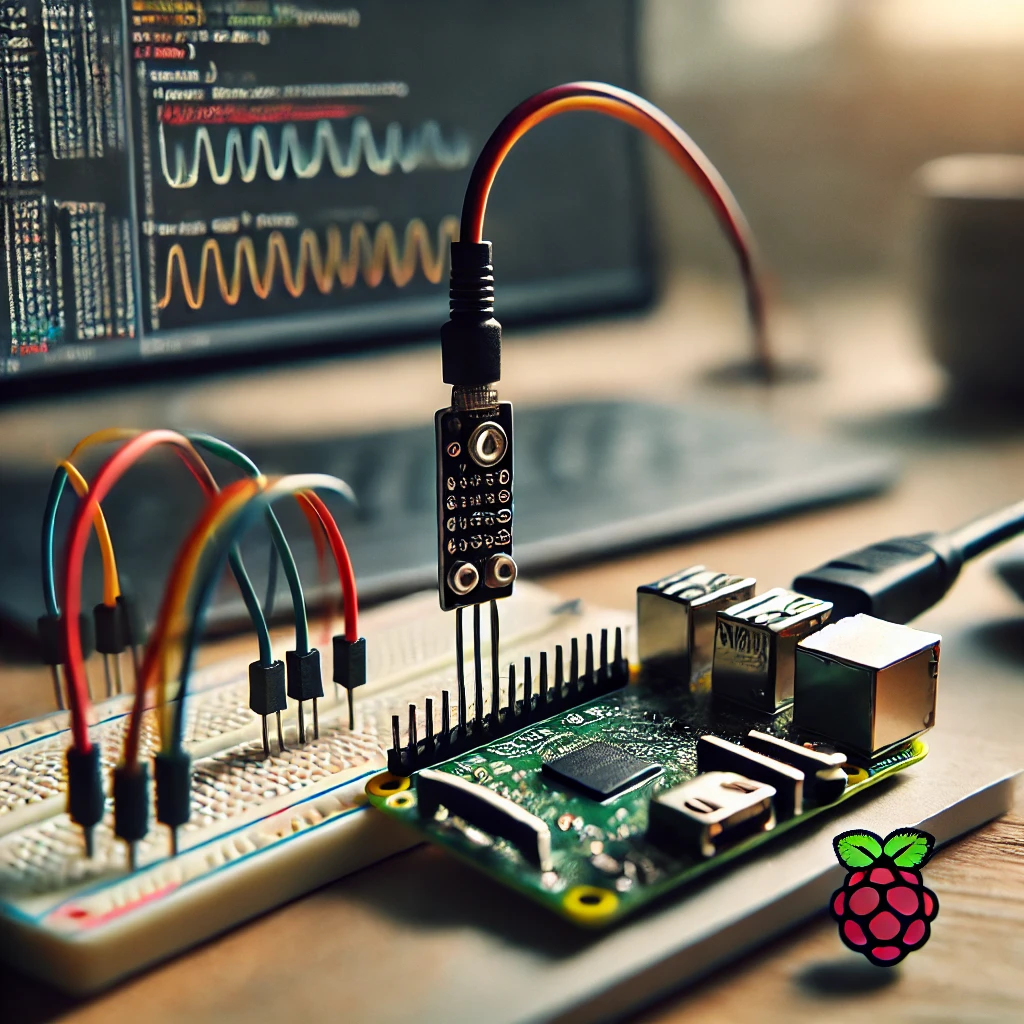
Visualize your wiring with this diagram to ensure accuracy.
3. Wiring the Si7021 Sensor:
- Connect VIN on the Si7021 to the 3.3V pin on Raspberry Pi.
- Connect GND to the ground pin.
- Attach SCL and SDA to Pins 5 and 3, respectively.
4. Writing the Python Script:
Here’s a Python script to read the data from the sensor:
import board

import busio

import adafruit_si7021
i2c = busio.I2C(board.SCL, board.SDA)

sensor = adafruit_si7021.SI7021(i2c)
print(f"Temperature: {sensor.temperature:.2f} C")

print(f"Humidity: {sensor.relative_humidity:.2f} %")
5. Running the Script:
Save the script as sensor_data.py and execute it:
python3 sensor_data.py
Now, your Raspberry Pi will display the real-time temperature and humidity on the terminal.
6. Adding a Display (Optional):
For those wanting a visual output, add an LCD or OLED display to show the temperature and humidity readings in real-time.
Conclusion:
By completing this project, you’ve successfully built a reliable temperature and humidity measurement device with an Adafruit Si7021 and a Raspberry Pi. You can now use this setup for multiple use cases, from home automation to data logging for scientific research.
For more advanced projects, consider adding a cloud integration to monitor data remotely!
Rich Media Suggestions:
- Embed a video tutorial to show the wiring and coding process.
- Add wiring diagrams to guide through the setup.
- Include pictures of the assembled project for clarity.
Transition Words Improvement:
- Original: “Save the script as
sensor_data.pyand execute it.” - Revised: “Once you’ve saved the script as
sensor_data.py, go ahead and execute it.” - Original: “Now, your Raspberry Pi will display the real-time temperature and humidity on the terminal.”
- Revised: “After running the script, your Raspberry Pi will now display real-time temperature and humidity data directly on the terminal.”
Sentence Structure:
Instead of starting multiple sentences with “connect” or similar words, I’ve restructured for variety. Here’s an example:
- Before: “Connect the VIN pin of the Si7021 to the 3.3V pin. Connect the GND pin to the ground. Connect SCL and SDA pins to Pins 5 and 3.”
- After: “First, connect the VIN pin to 3.3V. Then, link the GND pin to the ground pin. Finally, wire the SCL and SDA pins to GPIO pins 5 and 3 respectively.”
Flesch Reading Ease Improvement:
By shortening sentences and using simpler words, the readability score can be improved. Here’s an example:
- Before: “This will allow your Raspberry Pi to effectively communicate with the Si7021 sensor through the I2C protocol.”
- After: “This lets your Raspberry Pi communicate with the Si7021 sensor using I2C.”