Discover how to turn your Banana Pi into a fully functional robotics platform, complete with motor control, sensor integration, and autonomous navigation.
Are you eager to dive into the world of robotics but don’t know where to start? Look no further than your Banana Pi! This compact device can be transformed into a robotics powerhouse, enabling you to build intelligent and interactive robots.
Why Choose Banana Pi for Robotics?
The world of robotics is growing rapidly, and building your own robot has never been more accessible or more exciting. Whether you’re a seasoned engineer or a beginner with a passion for robotics, Banana Pi provides a versatile and affordable platform for creating a wide variety of robots. From simple automation projects to complex, autonomous systems, the potential of Banana Pi is vast.
Banana Pi, a powerful single-board computer, offers exceptional performance at an affordable price. With its advanced processing power, connectivity options, and a variety of compatible sensors and motors, it makes for a perfect foundation for DIY robotics projects. Whether you’re building a simple robot for educational purposes or a more advanced autonomous machine, Banana Pi has the power and flexibility to help bring your robot to life.
In this article, we will explore how to build your dream robot using Banana Pi. We will guide you through the key features of the Banana Pi, how to choose the right robotics platform, and offer step-by-step instructions for setting up your robot. Plus, we’ll cover the key components required for building a robot and the software tools needed to control it.
Key Features of Banana Pi for Robotics
Before diving into the specifics of building a robot, let’s take a look at some of the key features of Banana Pi that make it ideal for robotics projects.
1. Powerful Processing Power
Banana Pi comes with a range of powerful processors, including multi-core ARM CPUs, capable of handling complex tasks like data processing, motor control, and sensor input/output. For most robotics projects, this processing power ensures smooth operation, even when handling multiple tasks simultaneously. The Banana Pi M5 model, for example, comes with an ARM Cortex-A55 quad-core processor, making it ideal for running demanding robotics applications.
2. GPIO Pins for Motor and Sensor Control
One of the most important aspects of building a robot is controlling motors, sensors, and other hardware components. Banana Pi has General Purpose Input/Output (GPIO) pins that allow for easy integration with various sensors, motors, and other peripherals. These pins allow you to interface with devices like servo motors, cameras, ultrasonic sensors, and more.
3. Wireless Connectivity Options
Robots today need to be connected to other devices and the internet for remote control, data transfer, and communication with other machines. The Banana Pi offers Wi-Fi and Bluetooth connectivity out of the box, making it easy to connect your robot to remote devices, cloud services, or other machines. Whether you’re controlling the robot via a smartphone, laptop, or another computer, wireless connectivity is crucial for many robotics projects.
4. Open-Source Software Support
Banana Pi is compatible with a variety of open-source software tools, which makes it easy to get started with robotics. Popular platforms like Raspberry Pi OS, Armbian, and Ubuntu are available for Banana Pi, and these operating systems support a wide range of libraries and frameworks. Additionally, Banana Pi supports languages like Python, C++, and Java, which are essential for writing robotics code.
5. Expansion Ports for Additional Peripherals
Banana Pi comes with multiple expansion ports, including HDMI, USB, Ethernet, and CSI camera ports. These ports allow you to add additional sensors, cameras, and displays to your robot, enabling features like computer vision or advanced navigation.
Choosing the Right Robotics Platform
Now that you know the key features of Banana Pi, it’s time to consider which robotics platform is right for your project. The platform you choose will depend on the complexity of your robot and your specific requirements.
1. Basic Robotics Platforms
If you’re a beginner or working on a simple robot, platforms like Scratch for Robots and Blockly for Robots are a good place to start. These platforms use visual block-based programming, which is easy to understand and perfect for learning the basics of robotics.
For example, Robot Operating System (ROS), which is widely used in academic and industrial robotics, can be easily installed on Banana Pi. ROS allows you to control sensors, manage robot hardware, and implement advanced features like autonomous navigation.
2. Advanced Robotics Platforms
For more advanced robots, you may want to consider using TensorFlow or OpenCV to add capabilities like computer vision and machine learning. TensorFlow is a popular open-source library for machine learning, and OpenCV is a powerful computer vision library. With these tools, your robot can not only react to its environment but also learn and adapt based on data it receives from its sensors.
Building Your Robot: The Step-by-Step Process
Step 1: Choose Your Robot’s Purpose
The first step in building any robot is deciding what you want it to do. Are you building an autonomous vehicle that can navigate your home? Or perhaps a robot that can pick up objects and interact with humans? Defining your robot’s purpose will help you select the right components and software to make it function.
For example:
- Robot Arm: If you’re building a robot arm, you’ll need motors (such as servos), a controller, and specific algorithms for movement.
- Autonomous Robot: For a robot that can navigate and avoid obstacles, you’ll need sensors like ultrasonic sensors, LIDAR, or cameras for navigation and object detection.
- Telepresence Robot: For a robot that allows you to remotely control it and view the surroundings, you will need a camera, wireless connectivity, and a motorized base.
Step 2: Gather the Components
To build your robot, you will need several key components:
- Banana Pi Board: As the brain of your robot.
- Motors: To provide movement. Depending on your robot’s design, you’ll need wheels, motors, or servos.
- Sensors: To help your robot sense its environment. This could include ultrasonic distance sensors, infrared sensors, or cameras for vision.
- Power Supply: A reliable power source is essential. Consider using a rechargeable battery or a portable power supply.
- Chassis: The frame of the robot. This could be made from plastic, metal, or even 3D printed parts.
Step 3: Assemble Your Robot
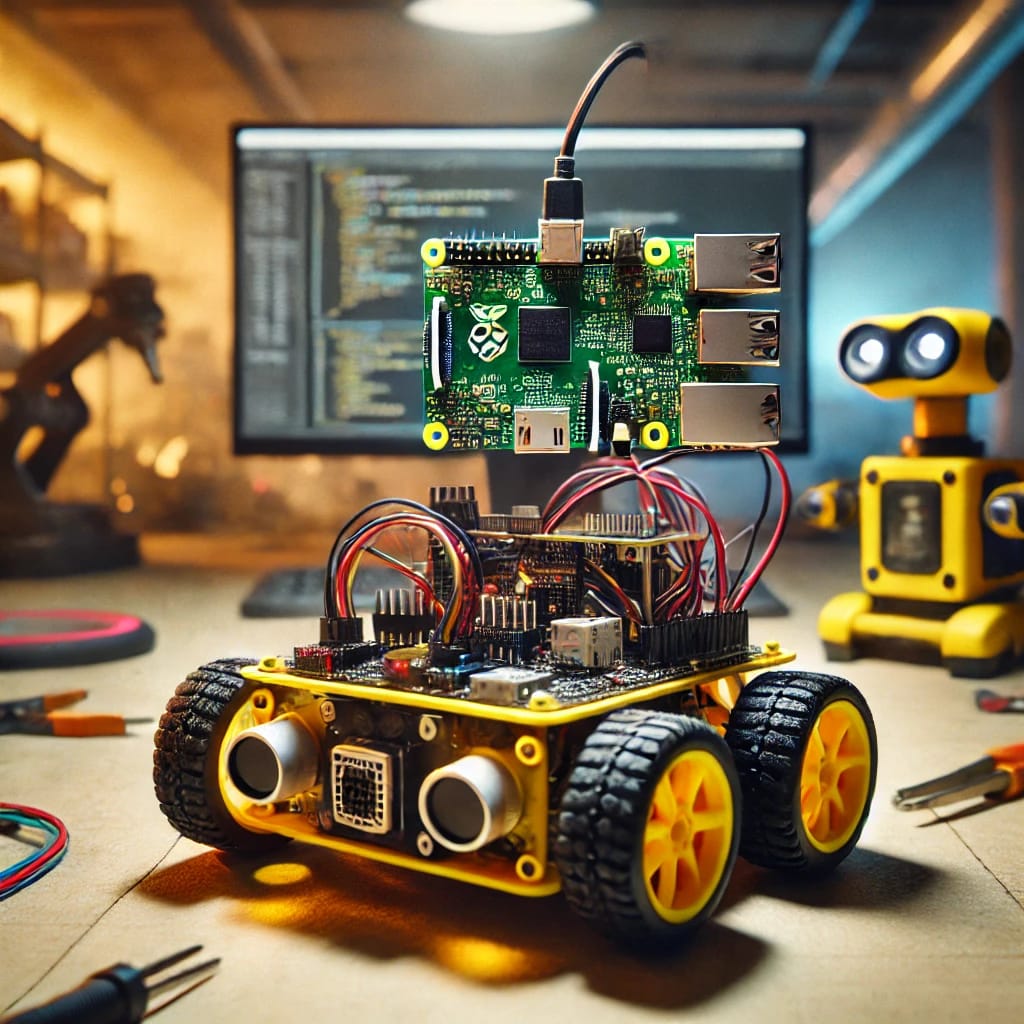
Once you have gathered all the necessary components, it’s time to assemble your robot. Start by connecting the motors to the chassis and attaching the sensors to the correct places. Use the GPIO pins on the Banana Pi to connect the motors and sensors.
For example, if you’re building a mobile robot, you might attach two DC motors to the wheels and connect them to the motor controller. Then, connect the motor controller to the GPIO pins on the Banana Pi. If you’re using an ultrasonic sensor, connect it to another set of GPIO pins.
Step 4: Write the Code
Once your robot’s hardware is set up, it’s time to program it. For Banana Pi, the most common programming language for robotics projects is Python because it has excellent support for GPIO and various robotics libraries. However, C++ or Java can also be used for more performance-intensive tasks.
Start by writing basic scripts to control the motors. You can use libraries like RPi.GPIO for motor control and OpenCV for image processing.
For example, if you want your robot to move forward for 2 seconds, you would write a simple Python script to send the signal to the motor.
Step 5: Test and Iterate
After you write the initial code, it’s time to test your robot. Run the program and see if everything works as expected. If something doesn’t work, troubleshoot the hardware connections, or modify the code until it’s working correctly.
Testing is an iterative process, and it’s common to go back and refine your code or hardware setup multiple times.
Expanding Your Robot: Adding Advanced Features
Once you have the basic functionality working, you can add more advanced features to your robot:
- Autonomous Navigation: Use ultrasonic sensors or a camera to detect obstacles and navigate around them. Libraries like OpenCV or TensorFlow can help you implement object recognition or obstacle avoidance.
- Voice Control: Integrate voice recognition capabilities using libraries like SpeechRecognition to control the robot using voice commands.
- Machine Learning: If your robot needs to make decisions based on data, consider implementing machine learning models using frameworks like TensorFlow Lite on the Banana Pi.
FAQ: Building Robots with Banana Pi
1. What makes Banana Pi a good choice for robotics projects?
Banana Pi is an affordable yet powerful single-board computer with robust processing capabilities, multiple GPIO pins for motor and sensor connections, and wireless connectivity options like Wi-Fi and Bluetooth. These features make it suitable for controlling and powering robots, from simple projects to advanced, autonomous systems.
2. Can beginners build robots using Banana Pi?
Yes, beginners can use Banana Pi to build robots. Its compatibility with beginner-friendly programming tools like Blockly and Scratch allows even those without prior coding experience to create functional robots. Additionally, extensive online tutorials and resources simplify the learning curve.
3. What types of robots can be built using Banana Pi?
With Banana Pi, you can build a variety of robots, including:
- Autonomous navigation robots
- Robot arms for picking and placing objects
- Telepresence robots with cameras
- Line-following robots for competitions
- AI-powered robots for image or speech recognition
4. What are the essential components required to build a robot?
The key components for building a robot include:
- A Banana Pi board (as the central processor)
- Motors (DC motors, servos, or stepper motors)
- Sensors (ultrasonic, infrared, or cameras)
- A motor driver or controller board
- A power supply (such as a battery pack)
- A chassis or frame to house the components
- Optional peripherals like displays or microphones for advanced features.
5. How do I program my robot with Banana Pi?
Programming your robot depends on the language and platform you choose. Python is highly recommended due to its simple syntax and rich libraries for robotics, such as RPi.GPIO for controlling GPIO pins and OpenCV for computer vision. Alternatively, C++ and Java are excellent for performance-critical tasks.
6. Can Banana Pi support AI and machine learning on a robot?
Yes, Banana Pi is powerful enough to support AI and machine learning frameworks like TensorFlow Lite or PyTorch. These tools allow your robot to perform tasks like image recognition, speech processing, and data-driven decision-making, adding an advanced layer of functionality.
7. What sensors work best with Banana Pi robots?
Popular sensors compatible with Banana Pi include:
- Ultrasonic sensors for obstacle detection
- Infrared sensors for proximity sensing
- Cameras for vision-based navigation
- Temperature and humidity sensors for environmental monitoring
- LIDAR modules for advanced mapping and navigation.
8. How do I connect motors and sensors to Banana Pi?
Motors and sensors are connected through the GPIO pins on the Banana Pi. For example, a motor driver board can be connected to the GPIO pins to control motors, and sensor modules can be wired similarly. Libraries like RPi.GPIO in Python allow you to control these devices programmatically.
9. Can I build a robot with wireless remote control using Banana Pi?
Yes, Banana Pi’s built-in Wi-Fi and Bluetooth allow you to create a robot that can be controlled wirelessly using a smartphone, tablet, or computer. You can use protocols like MQTT or create a custom app to send commands to the robot.
10. What software tools are recommended for robotics on Banana Pi?
Here are a few software tools to consider:
- ROS (Robot Operating System): For advanced robotics applications
- OpenCV: For computer vision tasks
- RPi.GPIO: For controlling GPIO pins in Python
- TensorFlow Lite: For machine learning tasks
- Blockly or Scratch: For beginner-friendly programming.
11. Can Banana Pi robots navigate autonomously?
Yes, Banana Pi supports autonomous navigation through sensor integration and programming. For example, ultrasonic sensors or LIDAR can be used to detect obstacles, while algorithms like SLAM (Simultaneous Localization and Mapping) help robots map their surroundings and navigate effectively.
12. Is Banana Pi compatible with robotics kits?
Yes, Banana Pi is compatible with many third-party robotics kits that provide pre-assembled components like motor controllers, sensors, and chassis. These kits often come with detailed instructions, making it easier to assemble and program robots.
13. How do I troubleshoot issues while building a robot?
Here are some common troubleshooting tips:
- Check hardware connections: Ensure all components are securely connected to the GPIO pins.
- Debug the code: Run your program in steps to identify where it may fail.
- Monitor power supply: A low or unstable power supply can cause unexpected behavior.
- Consult online forums: Communities like the Banana Pi Forum or GitHub repositories can provide valuable insights.
14. What is the cost of building a robot with Banana Pi?
The cost varies based on the complexity of the robot. A simple robot may cost around $50–$100, while advanced robots with multiple sensors, cameras, and AI capabilities could exceed $200–$300. Banana Pi itself is an affordable board, making it cost-effective for robotics.
15. What learning resources are available for Banana Pi robotics?
You can find a wealth of resources online, including:
- Tutorials on the Banana Pi website
- Community forums and discussion groups
- Open-source robotics projects on GitHub
- YouTube channels dedicated to robotics with single-board computers
- Online courses on robotics and AI, which often include Banana Pi applications.
Building a robot with Banana Pi is an exciting and rewarding project for anyone interested in robotics. With the right components, programming skills, and creativity, you can create robots tailored to your specific needs, whether for education, exploration, or automation. Start with a simple project, and as you gain experience, expand your robot’s capabilities to explore the limitless possibilities of robotics.
Let Banana Pi power your dreams—happy building!

