Learn how to deploy your Raspberry Pi 5 voice assistant with auto-start, remote access, and community sharing to create a seamless, scalable, and collaborative project.
Voice assistants have transformed how we interact with technology, offering convenience and efficiency in managing tasks, answering questions, and controlling smart devices. With the Raspberry Pi 5, you can create your own personalized voice assistant tailored to your specific needs. This project serves as an exciting introduction to IoT, speech recognition, and Python programming, making it accessible for enthusiasts and professionals alike. By the end of this guide, you’ll have a functional voice assistant capable of processing commands, responding to queries, and integrating with smart devices.
Why Build Your Own Voice Assistant?
Building a custom voice assistant with Raspberry Pi 5 offers several advantages over using commercial systems. It puts you in control of the assistant’s features, functionality, and data privacy. Furthermore, it’s an excellent way to gain hands-on experience with cutting-edge technology.
- Data Privacy and Security: Commercial assistants often rely on cloud services, raising privacy concerns. A DIY assistant ensures that all data remains locally stored.
- Cost Efficiency: Building your own assistant is far more cost-effective than purchasing a high-end commercial product.
- Customizability: You can design a system with unique commands, responses, and integrations that suit your lifestyle or work needs.
- Learning Opportunity: This project provides an excellent opportunity to learn about programming, speech recognition, and IoT.
- Interoperability: Your assistant can interact with other devices and systems, making it a versatile addition to your smart home setup.
A Raspberry Pi 5-based assistant combines power, flexibility, and affordability, allowing you to explore the capabilities of this powerful single-board computer.
Components You’ll Need
Before diving into the setup process, gather the necessary hardware and software components:
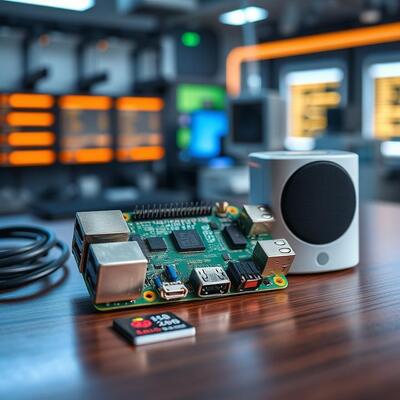
- Raspberry Pi 5: The main computing unit.
- MicroSD Card (32GB or higher): For storing the operating system and assistant software.
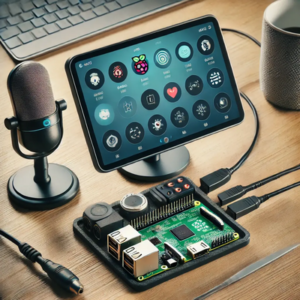
- USB Microphone: Essential for capturing voice commands.
- Speaker: To enable the assistant to communicate audibly.
- Power Supply: A USB-C adapter compatible with Raspberry Pi 5.
- Wi-Fi or Ethernet Connection: Required for online services and updates.
- Python: The primary programming language used in this project.
- Libraries: SpeechRecognition, PyAudio, gTTS (Google Text-to-Speech), and Flask for advanced features.
Each component plays a critical role in ensuring that your assistant operates smoothly and efficiently.
Step 1: Setting Up the Raspberry Pi 5
To start, set up your Raspberry Pi 5 with the necessary operating system and software.
- Install Raspberry Pi OS:
- Download Raspberry Pi OS from the official Raspberry Pi website
- Use Balena Etcher to flash the OS image onto your microSD card.
- Insert the card into the Pi, connect peripherals (keyboard, mouse, and monitor), and power it on.
- Update System Software:
Keeping the OS updated ensures compatibility with libraries and software. Run the following commands in the terminal: - Install Python:
Raspberry Pi OS comes with Python pre-installed, but ensure you have the latest version: - Install Required Libraries:
Install libraries for speech recognition, text-to-speech, and audio processing:
Step 2: Configuring the Hardware
Properly setting up your hardware is crucial for capturing and processing voice commands.
- Connect a Microphone and Speaker:
- Plug in a USB microphone and a speaker (via audio jack or Bluetooth).
- Test the microphone using the following command:
- Test Audio Output:
Verify the speaker’s functionality by playing the recorded file: - Adjust Audio Settings:
If the microphone or speaker isn’t working as expected, usealsamixerto adjust the volume or troubleshoot the device. - Enable Advanced Audio Features:
Install PulseAudio for better audio management:
Step 3: Programming the Voice Assistant
This step involves coding your assistant to listen, process commands, and respond intelligently.
- Create a Python Script:
Open a Python editor and start a new script: - Import Libraries:
Include the required Python modules at the beginning of the script: - Capture Voice Input:
Write a function to capture and recognize voice commands: - Convert Text to Speech:
Use gTTS to enable your assistant to respond audibly: - Handle Commands:
Add basic commands and responses: - Run the Assistant:
Combine the functions into a loop:
Step 4: Expanding the Voice Assistant
Once the basic assistant is operational, you can enhance its capabilities:
- Smart Home Integration:
Use MQTT to control IoT devices like lights and thermostats. - API Integrations:
Access online APIs for weather updates, news, or music streaming. - Natural Language Processing (NLP):
Implement libraries like SpaCy or GPT APIs for advanced conversation handling. - Multi-Language Support:
Add support for different languages using gTTS. - Wake Word Detection:
Implement wake word functionality with Snowboy or Precise.
Step 5: Testing and Debugging
- Command Testing:
Run the assistant and test it with various commands. Identify areas for improvement. - Error Logging:
Log errors to a file for debugging: - Audio Adjustments:
Modify microphone sensitivity or audio output for better performance.
Step 6: Deploying the Assistant
Deploying your smart voice assistant effectively ensures it is ready for use and can run smoothly in a real-world environment. The deployment process involves setting up the assistant to automatically start when the Raspberry Pi boots, enabling remote control for maintenance or updates, and sharing your project with the broader community. This section will guide you through configuring auto-start for your assistant, setting up remote access, and contributing to the community.
Auto-Start Configuration
One of the most important aspects of deploying your voice assistant is ensuring that it runs automatically when the Raspberry Pi is powered on. This way, you won’t need to manually start the assistant every time you reboot the Pi. To achieve this, you can set up your Raspberry Pi to launch the assistant script at startup using either cron or systemd.
Using cron for Auto-Start:
- Open the terminal and type the following command to open the crontab editor:
- Add a new line at the end of the file to specify the script that should be executed at startup. For example:
This line tells the system to run the voice_assistant.py script automatically whenever the Raspberry Pi is rebooted.
- Save and exit by pressing
CTRL+X, then confirm by pressingYandEnter.
Using systemd for Auto-Start:
Alternatively, you can use systemd, which is more robust and provides more control over your service. To create a systemd service:
- Create a new service file in
/etc/systemd/system/: - Add the following content to the service file:
- Save and close the file, then enable and start the service:
Using systemd gives you the benefit of better logging, automatic restart capabilities, and more detailed control over how the voice assistant operates. It is the preferred method for more complex applications that need reliability and debugging options.
Remote Access
Once your voice assistant is up and running, it’s important to have the ability to access it remotely for updates, troubleshooting, or adjustments. The Raspberry Pi 5 can be easily accessed remotely using SSH (Secure Shell), a protocol that allows you to control the Pi from another computer or device. This setup is crucial for ongoing maintenance without needing to interact with the Pi physically.
Setting Up SSH:
- By default, SSH is disabled on the Raspberry Pi. To enable it, use the Raspberry Pi Configuration Tool:
- Navigate to Interfacing Options and select SSH, then choose Yes to enable SSH.
- Restart the Raspberry Pi for the changes to take effect:
Accessing the Pi Remotely:
- From your local machine, you can connect to the Raspberry Pi using SSH. Open a terminal (or Command Prompt if you’re on Windows) and type:
Replace
<Raspberry_Pi_IP_Address>with the actual IP address of your Raspberry Pi. If you don’t know the IP address, you can find it by typing the following command in the terminal on the Pi: - Enter the password for the
piuser (default:raspberryunless changed). - Once logged in, you can control the voice assistant, update software, or modify configurations as needed.
Setting Up VNC for Graphical Access:
If you prefer to access the Raspberry Pi’s graphical interface remotely (for example, to view the assistant’s output on a screen), you can enable VNC (Virtual Network Computing). The VNC server can be installed using:
Enable VNC in the Raspberry Pi Configuration Tool under the Interfacing Options section.
Community Sharing
Once you’ve built and deployed your voice assistant, you can share your project with the Raspberry Pi and open-source communities. Sharing your code not only helps others but can also provide you with valuable feedback from experienced developers. Platforms like GitHub are ideal for sharing your project with a large audience. By creating a public repository, you allow others to clone your project, contribute, or offer suggestions for improvement.
Creating a GitHub Repository:
- First, create a GitHub account if you don’t already have one at https://github.com.
- Once logged in, click the + symbol in the top-right corner and select New Repository.
- Name your repository (e.g., “raspberry-pi-voice-assistant”) and choose whether you want it to be public or private.
- After creating the repository, you can push your local project to GitHub. Navigate to your project directory on the Pi, and use the following commands:
By sharing your project on GitHub, you open up opportunities for collaboration and improve the overall quality of your work.
Engaging with the Community:
Participate in forums like the Raspberry Pi Stack Exchange or Reddit’s r/raspberry_pi to get feedback, ask questions, or help others with their projects. Sharing your project and learning from others is a key part of the open-source movement and helps push forward the boundaries of what Raspberry Pi can do.
- Raspberry Pi Stack Exchange: https://raspberrypi.stackexchange.com
- Reddit’s Raspberry Pi community: https://www.reddit.com/r/raspberry_pi
Optional Steps and Enhancements
- Wake Word Detection
- Integrate a wake word system like Snowboy or Precise so the assistant listens only after being triggered by a specific word (e.g., “Hey Pi”).
- This requires a dedicated script or integration with the main program.
- Advanced NLP Integration
- Use APIs like OpenAI GPT or Dialogflow to improve conversational abilities. This adds a natural, human-like interaction experience.
- Smart Device Control
- Add protocols like MQTT or integrate with platforms like Home Assistant or IFTTT for full smart home automation.
- GUI Interface
- Create a graphical user interface (GUI) using frameworks like Tkinter or PyQt to display responses, history, and options.
- Offline Speech Recognition
- Use offline libraries like PocketSphinx or DeepSpeech to eliminate reliance on internet connectivity for speech recognition.
- Multiple Language Support
- Expand the system to recognize and respond in multiple languages, adding versatility for users in different regions.
- Cloud Integration
- Save and retrieve user preferences, commands, or logs using cloud services like AWS, Firebase, or Google Cloud.
- Advanced Hardware Features
- Add LEDs to indicate the assistant’s status (listening, processing, or responding).
- Integrate a touchscreen display for visual responses and additional input options.
- Security Features
- Secure the assistant by implementing authentication methods like voice recognition or passcodes for sensitive tasks.
- Expand Commands
- Write scripts for more advanced or niche commands, such as controlling multimedia, reading news, or managing tasks.
- Performance Optimization
- Profile the assistant’s performance and optimize code or hardware configurations to reduce latency.
- Custom Voice Responses
- Create personalized responses or integrate celebrity-like voice packs for entertainment purposes.
While the guide already provides a solid foundation, incorporating these additional features can elevate your voice assistant to a sophisticated and highly functional tool. The specific steps depend on your requirements, technical expertise, and available resources.
By following this comprehensive guide, you’ve created a functional and customizable voice assistant. With endless opportunities for enhancement, this DIY project demonstrates the versatility and power of Raspberry Pi 5. Whether for personal use or as a stepping stone to advanced IoT projects, your voice assistant is a testament to your creativity and technical skills.
FAQs
1. What is a Raspberry Pi 5?
Raspberry Pi 5 is the latest iteration of the popular single-board computer, offering enhanced processing power, more RAM, and better connectivity options, making it ideal for a range of DIY projects, including smart voice assistants.
For more details, visit: https://www.raspberrypi.org
2. Can I use other models of Raspberry Pi for building a voice assistant?
While the Raspberry Pi 5 is ideal for this project due to its improved processing power, you can use earlier models like Raspberry Pi 4 or even the Raspberry Pi 3, though performance might be slower or less reliable.
Learn more at: https://www.raspberrypi.org/products/
3. Do I need an internet connection to use the voice assistant?
Yes, an internet connection is required for cloud-based services like Google Assistant or Amazon Alexa. However, offline speech recognition can be set up using open-source solutions like PocketSphinx.
Explore options here: https://pocketsphinx.github.io/
4. What are the essential components for this project?
The key components include a Raspberry Pi 5, a microphone (USB or 3.5mm), a speaker, and software like Python, SpeechRecognition, and gTTS.
Get Raspberry Pi components at: https://www.raspberrypi.org/products/
5. What software do I need to install for the voice assistant?
You’ll need to install Python, along with libraries such as SpeechRecognition, PyAudio, gTTS, and more for speech recognition and text-to-speech capabilities.
Download from: https://www.python.org/downloads/
6. How do I enable voice recognition on the Raspberry Pi?
To enable voice recognition, you’ll install and configure the SpeechRecognition library, which works with various APIs like Google’s or offline engines like CMU Sphinx.
Learn more at: https://pypi.org/project/SpeechRecognition/
7. Can I make the voice assistant control smart home devices?
Yes, you can integrate your voice assistant with platforms like IFTTT, Home Assistant, or MQTT to control devices such as lights, thermostats, and more.
Read more here: https://home-assistant.io/
8. How do I make the assistant respond with a voice?
To enable the assistant to respond verbally, you can use the gTTS (Google Text-to-Speech) library, which converts text responses into speech.
Check it out here: https://pypi.org/project/gTTS/
9. How can I add more commands to the voice assistant?
You can program additional commands by adding more conditional statements in the Python script. You can customize the assistant to recognize various keywords and perform actions accordingly.
Find more on automation here: https://www.automationdirect.com/
10. How do I make the voice assistant more accurate?
Accuracy can be improved by training the speech recognition model with specific voice commands and ensuring a high-quality microphone is used for clear audio input.
More tips available at: https://www.techradar.com/best/best-voice-assistants
11. Can I integrate the voice assistant with third-party services?
Yes, you can integrate your voice assistant with services like weather APIs, news APIs, and smart home platforms like Google Home or Alexa for extended functionality.
Learn about API integrations: https://www.programmableweb.com/
12. How do I add a wake word to the voice assistant?
To implement a wake word, you can use tools like Snowboy or Precise for always-on listening that activates the assistant with a specific word like “Hey Pi.”
Explore Snowboy here: https://snowboy.kitt.ai/
13. How can I improve performance for real-time recognition?
To enhance real-time recognition, optimize your code by reducing unnecessary operations and use a higher-end microphone for better sound quality.
For real-time speech recognition, check: https://www.coursera.org/articles/real-time-speech-recognition
14. Can I make the assistant run without an internet connection?
Yes, by using offline voice recognition libraries like CMU Sphinx or PocketSphinx, you can make the assistant function without an internet connection.
Download PocketSphinx: https://github.com/cmusphinx/pocketsphinx
15. What’s the next step after building the basic voice assistant?
Once the basic assistant is working, you can add features such as AI-driven conversation, integrate IoT devices, or enhance its smart home capabilities.
Find inspiration here: https://www.instructables.com/


