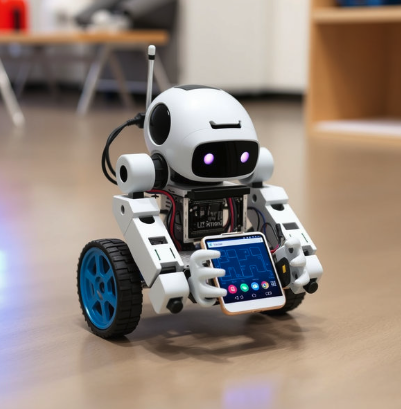
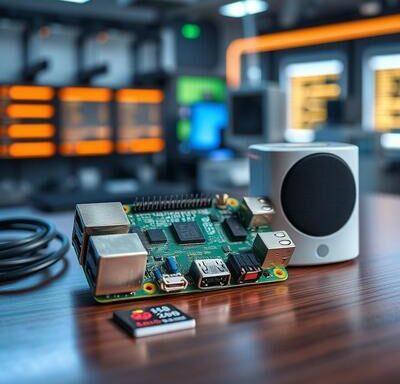
In the world of robotics, affordable single-board computers like Orange Pi are changing the landscape for hobbyists, students, and professionals alike. The capabilities of these boards allow robotics enthusiasts to build a wide range of systems, from simple line-following robots to complex autonomous machines equipped with artificial intelligence (AI) and machine learning algorithms.
In this comprehensive guide, we will explore the advantages of using Orange Pi for robotics projects, outline step-by-step instructions for creating simple and advanced robots, and offer insights into how you can make the most out of this powerful yet budget-friendly platform. Whether you’re looking to create your first robot or aiming to tackle more advanced systems, Orange Pi offers the versatility, power, and affordability needed for a variety of robotics projects.
Why Orange Pi for Robotics?
1. Affordable Yet Powerful
The primary reason for choosing Orange Pi for robotics projects is its affordability. Unlike many high-performance single-board computers (SBCs), such as the Raspberry Pi, which often come with higher price tags, Orange Pi offers similar or even superior performance at a fraction of the cost. For example, the Orange Pi 5, which comes with an octa-core processor, 4GB of RAM, and a Mali-G610 MP4 GPU, is highly capable for handling complex tasks such as computer vision and real-time robotics control.
2. Versatility and Connectivity
Orange Pi’s multiple connectivity options (Wi-Fi, Ethernet, Bluetooth) make it ideal for building robots that can communicate with other systems, either over the internet or via local networks. This is especially useful for building IoT-enabled robots, remote-controlled systems, or autonomous robots that need to process data in real time.
3. GPIO and Expansion
Orange Pi boards are equipped with a variety of GPIO (General Purpose Input/Output) pins, which are essential for connecting sensors, motors, and actuators. These pins allow the Orange Pi to interface with various components like ultrasonic sensors, cameras, temperature sensors, and motor drivers, enabling you to build and control robotic systems.
4. A Strong Developer Community
Orange Pi’s developer community is relatively active, and many resources are available online for troubleshooting, project ideas, and tutorials. This is particularly important for new users who are just starting their journey into robotics, as it provides a solid support structure for problem-solving and innovation.
Setting Up Your Orange Pi for Robotics Projects
Before jumping into specific robotics projects, it’s essential to get your Orange Pi set up and ready for development. In this section, we will cover the necessary steps to prepare your Orange Pi for building robots.
1. Choosing the Right Orange Pi Model
Orange Pi comes in various models, each with different capabilities. When selecting a board for robotics, consider the complexity of your project and the computing power you require.
-
Orange Pi 5: This board is equipped with an octa-core processor, 4GB of RAM, and supports a wide range of peripherals. It is ideal for more complex robotics tasks, such as AI-based navigation, object detection, or multi-sensor systems.
-
Orange Pi 3: If your project involves basic robotics tasks like controlling motors or handling simple sensors, the Orange Pi 3 might be more suitable. It’s cheaper but still provides sufficient processing power for many robotics applications.
2. Installing the Operating System
Once you’ve selected your Orange Pi model, you will need to install an operating system. Most users opt for Armbian, a Linux distribution tailored for ARM devices like Orange Pi. Armbian is lightweight and provides a stable environment for robotics development.
Steps to install Armbian:
- Download the Armbian image for your Orange Pi model from the official website.
- Flash the downloaded image to a microSD card (8GB or larger) using Etcher or Rufus.
- Insert the SD card into your Orange Pi and power it on.
- Connect the board to a monitor, keyboard, and mouse to perform the initial setup, including configuring the Wi-Fi network and system locale.
- For remote access, you can enable SSH to control the board via terminal commands.
3. Connecting the Components
For robotics projects, you’ll need to connect various components like motors, sensors, and actuators. Orange Pi provides GPIO pins for interfacing with these components.
Basic hardware requirements:
- Sensors: Ultrasonic distance sensors, infrared sensors for line-following, and cameras for computer vision.
- Motors: DC motors or servos for robot movement. You will also need a motor driver board (e.g., L298N) to control the motors via GPIO.
- Power Supply: Robots require more power than a typical Raspberry Pi setup, so ensure that you have a 5V, 3A power adapter for the Orange Pi and external power for motors.
Creating a Simple Line Following Robot
Now that your Orange Pi is set up and your components are connected, let’s build a simple line-following robot. This beginner-level project will teach you how to control motors using sensor data and develop a basic control algorithm.
Materials Needed:
- Orange Pi 3 or Orange Pi 5
- Two line-following sensors (IR-based)
- DC motors and a motor driver (L298N)
- Chassis for the robot
- Wheels for movement
- Power supply (e.g., 5V battery pack)
Step 1: Wiring the Components
First, wire the components to the GPIO pins. You’ll need to connect:
- Left and right IR sensors to the GPIO pins for input detection.
- Motors to the motor driver, and the motor driver to the GPIO pins for motor control.
Step 2: Writing the Program
Next, write a Python program that reads input from the sensors and adjusts the motor control to keep the robot on the track. Here’s an example of a basic Python script:
Step 3: Testing the Robot
After uploading the code, place the robot on a track and observe how it follows the line. Adjust the sensor readings and motor speeds if necessary to improve performance. The robot should follow the path by responding to the sensor’s input and adjusting its direction accordingly.
Advanced Project: Autonomous Robot with Computer Vision
After mastering basic robotics tasks, you can take it to the next level by building an autonomous robot using computer vision. This project involves using a camera connected to the Orange Pi, along with OpenCV, to help the robot navigate and avoid obstacles on its own.
Step 1: Setting Up OpenCV on Orange Pi
Before you can use computer vision, you need to install the OpenCV library on your Orange Pi. OpenCV allows the robot to analyze images from the camera and make decisions based on the visual data.
Install OpenCV:
Step 2: Building the Robot Hardware
For this project, the hardware setup is more complex:
- Orange Pi 5 or Orange Pi 3
- USB Camera or CSI Camera Module
- DC motors with motor driver (L298N)
- Ultrasonic sensors for obstacle detection
Step 3: Writing the Vision Algorithm
With OpenCV installed, you can use the camera to capture video frames and process them to detect obstacles and objects in the environment.
Here is an example of using OpenCV to detect edges (which can be used for object detection and navigation):
Step 4: Integrating with Motor Control
Now that the robot can detect objects using computer vision, you can use the edge detection or color detection results to guide the motors and avoid obstacles. For instance, if the robot detects an obstacle within a certain range, it can reverse or turn.
Orange Pi offers a cost-effective and versatile platform for robotics enthusiasts to build everything from beginner-level projects like line-following robots to more advanced autonomous systems powered by computer vision and AI. The flexibility of Orange Pi’s GPIO pins, strong processing power, and compatibility with various sensors and cameras make it an ideal choice for anyone looking to explore robotics without breaking the bank.
By following the steps outlined in this article, you can start with basic projects and gradually scale up to more advanced systems. With practice, the possibilities are endless—whether it’s building robots that autonomously navigate or integrating machine learning algorithms for advanced tasks.
Feel free to check out our other website at http://master3dp.com/ where you can learn to 3D print anything needed for a project.


