Build a DIY ESP32 home security system with cameras, motion sensors, and real-time notifications. Follow our step-by-step guide to protect your home effectively.
ESP32 Home Security System
Securing your home doesn’t have to mean spending a fortune. With modern technology like the ESP32 microcontroller, you can create a personalized and cost-effective home security system. This DIY approach saves money and empowers you to tailor your setup to your specific needs.
The ESP32 offers robust features such as Wi-Fi connectivity, GPIO pins for sensor pins, and camera module support for a comprehensive security solution. Whether you want to add motion detection, door/window sensors, or live camera feeds, the ESP32 can handle it.
In this article, you’ll learn how to build a fully functional ESP32-based security system step-by-step. From gathering components to testing the final setup, each phase is detailed to ensure success. By the end of this guide, you’ll have a reliable, custom-built system to monitor and protect your home.
Gathering the Necessary Components
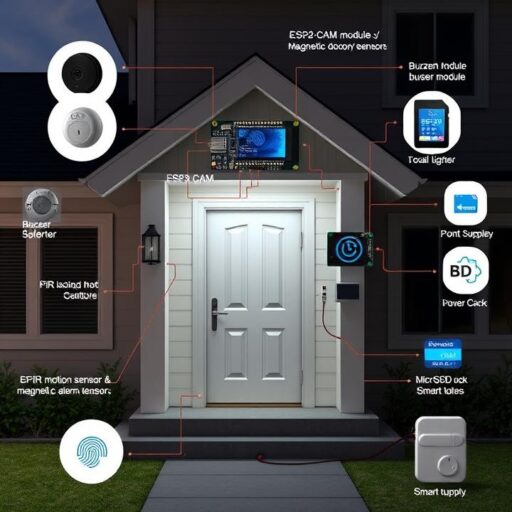
To get started, you’ll need the right components for your security system. While the ESP32 is the centerpiece, other parts are essential for functionality and efficiency.
- ESP32 Microcontroller: Acts as the system’s brain, processing input, and managing outputs.
- ESP32-CAM Module: Adds live video surveillance capabilities.
- PIR Motion Sensors: Detect movement in designated areas.
- Magnetic Door/Window Sensors: Alerts when entry points are breached.
- Buzzer or Alarm Module: Provides an audible warning.
- MicroSD Card with Reader: For storing video and event logs locally.
- Power Supply: USB adapter or batteries to power your system.
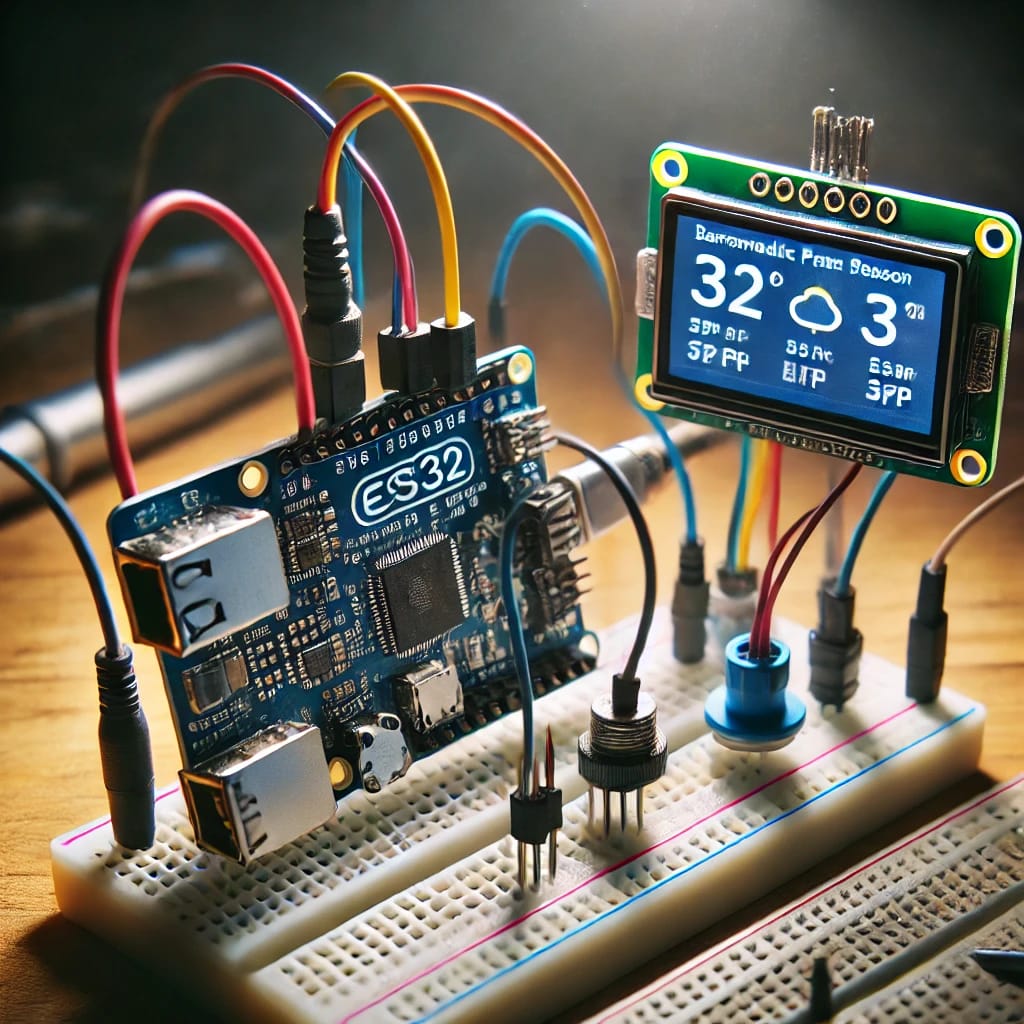
- Breadboard and Jumper Wires: For initial prototyping and connections.
- Resistors and LEDs: Useful for status indicators and feedback.
You may also consider optional items like a relay module for controlling appliances or additional cameras for wider coverage. Once you’ve gathered everything, ensure you have a workspace with sufficient lighting and safety precautions.
Setting Up the ESP32 for Programming
Before connecting your hardware, configure your ESP32 board for programming. This step ensures smooth integration with your system’s components later.
Start by downloading and installing the Arduino IDE, the software required for coding your ESP32. Visit www.arduino.cc to get the latest version. Next, add the ESP32 board manager to the IDE:
- Open File > Preferences and paste this URL:
https://dl.espressif.com/dl/package_esp32_index.json - Navigate to Tools > Board > Board Manager, search for “ESP32,” and install the library.
Connect your ESP32 to your computer using a USB cable. Select the correct board and port in the IDE settings. Test your setup by uploading a basic code snippet like this:
void setup() {

Serial.begin(115200);

Serial.println("ESP32 setup complete!");

}Open the serial monitor to confirm functionality. A successful test ensures your board is ready for further programming.
Integrating Motion Detection
Motion detection is a core feature of any security system, allowing you to monitor activity in critical areas. PIR sensors are widely used for this purpose due to their reliability and low cost.
Connect your PIR sensor to the ESP32 as follows:
- VCC to the 5V pin.
- GND to the ground pin.
- OUT to a GPIO pin (e.g., GPIO 14).
With the wiring in place, upload the following code to your ESP32:
int motionPin = 14;
void setup() {
pinMode(motionPin, INPUT);
Serial.begin(115200);
}
void loop() {
if (digitalRead(motionPin) == HIGH) {
Serial.println(“Motion detected!”);
}
}
Test the sensor by moving in front of it. When motion is detected, the serial monitor should display a message. Adjust the sensor’s sensitivity and range using the onboard potentiometer for optimal performance.
Adding Door and Window Sensors
Monitoring entry points is another vital aspect of home security. Magnetic door and window sensors are ideal for detecting unauthorized access.
These sensors consist of a relay switch and a magnet. When the magnet moves away from the switch, the circuit breaks, triggering an alert.
- Attach the reed switch to a fixed part of the door or window and the magnet to the movable part.
- Connect the sensor to your ESP32:
- One terminal to GND.
- The other terminal to a GPIO pin (e.g., GPIO 16).
Upload this code to your ESP32:
int doorPin = 16;
void setup() {
pinMode(doorPin, INPUT_PULLUP);
Serial.begin(115200);
}
void loop() {
if (digitalRead(doorPin) == LOW) {
Serial.println(“Door or window opened!”);
}
}
Mount the sensors securely and test by opening and closing the door/window. The ESP32 should log the events in real time.
Incorporating Video Surveillance
Adding a camera to your ESP32-based system provides real-time visual monitoring, enhancing overall security. The ESP32-CAM module is an excellent choice for this purpose.
To integrate the ESP32-CAM:
- Wire it to your ESP32, ensuring proper connections for power, ground, and data pins.
- Insert a formatted microSD card into the ESP32-CAM module for storing footage.
Upload an example sketch provided in the Arduino IDE’s library for the ESP32-CAM. After successful uploading, you can access the live camera feed through a browser by entering the ESP32’s IP address. Place the camera in a strategic location for maximum coverage.
Setting Up Alerts and Notifications
Real-time notifications ensure you’re immediately aware of any security breaches. Use services like IFTTT (If This Then That) or the Blynk platform to send alerts to your phone or email.
Start by creating a webhook in IFTTT for events like motion detection or door sensor activation. Integrate this webhook into your ESP32 code using the HTTP client library:
#include <WiFi.h>

#include <HTTPClient.h>HTTPClient http;
http.begin(“https://maker.ifttt.com/trigger/security_alert/with/key/YOUR_IFTTT_KEY”);
http.GET();
http.end();
}
Customize the alert messages to include details such as the time and location of the breach.
Setting Up an Alarm System
A buzzer or alarm module can act as an immediate deterrent in the event of unauthorized access. The loud sound draws attention and can scare off intruders. Adding an alarm system to your ESP32-based setup is simple yet effective.
Hardware Setup
Connect a buzzer to your ESP32 as follows:
- The positive pin of the buzzer connects to a GPIO pin, such as GPIO 17.
- The negative pin connects to GND.
Programming the Alarm
Upload the following code to trigger the buzzer when a security breach is detected:
int buzzerPin = 17;

bool alert = false;pinMode(buzzerPin, OUTPUT);
Serial.begin(115200);
}
if (alert) {
digitalWrite(buzzerPin, HIGH); // Turn buzzer on
delay(1000); // Wait for 1 second
digitalWrite(buzzerPin, LOW); // Turn buzzer off
delay(1000); // Wait for 1 second
}
}
Modify the alert variable within your main security logic to activate the buzzer when necessary, such as after motion detection or when a door sensor is triggered.
Testing the Alarm
Simulate a security breach by manually triggering one of the sensors. Ensure the buzzer activates promptly and the sound is loud enough to be effective.
Creating a User Interface with Blynk
Blynk, a user-friendly IoT platform, allows you to control and monitor your security system from your smartphone. With its drag-and-drop features, you can build a custom interface for real-time updates and control.
Setting Up the Blynk App
- Download the Blynk app from Google Play or the App Store.
- Create a new project and select ESP32 as the device.
- Add widgets like buttons, LEDs, and gauges for controls and status indicators.
Integrating Blynk into the Code
Install the Blynk library in your Arduino IDE and add your project’s authentication token to the code. Use the following snippet to connect the ESP32 to Blynk:
#include <WiFi.h>

#include <BlynkSimpleEsp32.h>
char ssid[] = “YOUR_WIFI_SSID”;
char pass[] = “YOUR_WIFI_PASSWORD”;
Blynk.begin(auth, ssid, pass);
}
Blynk.run();
}
Test the app by pressing the virtual buttons to control the ESP32 or receive alerts directly on your phone.
Integrating Cloud Storage for Logs and Footage
Local storage using an SD card is effective, but integrating cloud storage adds redundancy and accessibility. Platforms like Google Drive or AWS IoT can store event logs and camera footage.
Using Google Drive API
- Set up Google Drive API access and generate credentials for your ESP32.
- Install the required libraries, such as
HTTPClient, for cloud integration. - Modify your code to upload data or images to the cloud after each security event.
Example code for uploading a file:
#include <WiFi.h>

#include <HTTPClient.h>HTTPClient http;
http.begin(“https://www.googleapis.com/upload/drive/v3/files?uploadType=media”);
http.addHeader(“Authorization”, “Bearer YOUR_ACCESS_TOKEN”);
http.addHeader(“Content-Type”, “application/octet-stream”);
http.POST(filePath);
http.end();
}
Test the upload functionality by simulating a breach and ensuring the footage or logs appear in your cloud account.
Powering the System for Reliability
Power interruptions can compromise your security system. Adding backup options ensures continuous operation.
Power Supply Options
- Rechargeable Batteries: Use lithium-ion batteries with a charging module to keep your ESP32 running during outages.
- Power Banks: A large-capacity power bank can act as a temporary power source.
- Solar Panels: For off-grid or eco-friendly setups, solar panels with a charge controller are excellent options.
Testing Power Resilience
Unplug the main power source and observe if the backup power seamlessly takes over. Optimize your system’s power consumption by using sleep modes for the ESP32 when inactive.
Final Testing and Deployment
Before deploying the system, ensure every component works as intended. Follow these steps for thorough testing:
- Sensor Accuracy: Simulate various scenarios, such as opening doors or moving in front of motion sensors.
- Camera Feed: Verify the live feed and recording functionality.
- Alert Mechanism: Ensure notifications are sent promptly to your phone or email.
- Buzzer Activation: Check if the alarm triggers appropriately.
- Cloud Storage: Confirm that logs and footage are uploaded correctly.
Mount all components securely and place sensors, cameras, and alarms in strategic locations. Regularly inspect the system to ensure long-term reliability.
With an ESP32-based home security system, you can achieve robust protection at a fraction of the cost of commercial systems. By combining motion detection, video surveillance, cloud storage, and user-friendly controls, you’ve created a comprehensive setup tailored to your needs.
Regular updates and maintenance will keep your system efficient and up-to-date. This project not only enhances your home security but also expands your technical skills, showcasing the vast potential of IoT devices like the ESP32.
Would you like assistance with a specific part of this project, such as diagrams or additional code examples? Let me know!
FAQs for ESP32 Home Security System
1. What makes the ESP32 a good choice for a home security system?
The ESP32 is a versatile microcontroller with built-in Wi-Fi and Bluetooth, making it ideal for IoT applications. Its affordability, low power consumption, and ability to connect multiple sensors and devices allow you to build an efficient and cost-effective security system. For more details, visit https://www.espressif.com.
2. What types of sensors can I use with the ESP32?
Common sensors include:
- Motion sensors (PIR) for detecting movement.
- Magnetic reed switches for door and window monitoring.
- Temperature and humidity sensors to monitor environmental conditions.
- Cameras, such as ESP32-CAM, for video surveillance.
Choose sensors based on your specific security needs. A detailed guide on sensor compatibility is available at https://www.iotdesignpro.com.
3. How do I ensure the ESP32 stays connected to my Wi-Fi?
To maintain a stable connection:
- Place the ESP32 within a strong Wi-Fi signal range.
- Use a static IP address to prevent disconnection issues.
- Implement a reconnection routine in your code to handle temporary network outages.
For example, a reconnection routine can be found at https://www.arduino.cc.
4. Can I integrate cloud storage with my ESP32 security system?
Yes, platforms like Google Drive, Dropbox, or AWS IoT support file and data uploads. By using HTTP or MQTT protocols, your ESP32 can upload logs or video footage to the cloud. A sample Google Drive integration tutorial is available at https://developers.google.com/drive.
5. What programming skills are needed to set up this system?
Basic knowledge of:
- Arduino IDE for coding and uploading sketches.
- C++ or Arduino programming language for device-specific code.
- Network protocols (HTTP/MQTT) for internet-based features.
Even beginners can follow step-by-step tutorials, such as those found at https://www.instructables.com.
6. How secure is an ESP32-based home security system?
Security largely depends on your implementation:
- Use encrypted communication like HTTPS or MQTT with SSL.
- Keep your ESP32 firmware updated.
- Secure your Wi-Fi network with strong passwords.
Learn more about ESP32 security practices at https://randomnerdtutorials.com.
7. Can I monitor my system remotely?
Yes, you can use:
- Blynk App: Provides a user-friendly interface for real-time control and monitoring.
- Telegram or WhatsApp Bots: Send alerts directly to your smartphone.
Visit https://blynk.io for detailed instructions on setting up remote monitoring.
8. How can I power my system during outages?
Options include:
- Rechargeable batteries paired with charging circuits.
- Solar panels for renewable energy.
- UPS (Uninterruptible Power Supplies) for prolonged power backup.
For affordable battery backup solutions, check https://www.adafruit.com.
9. Is this system suitable for large homes or offices?
Yes, but scalability requires additional planning:
- Use multiple ESP32 devices to cover larger areas.
- Employ mesh networking for improved connectivity.
- Centralize data management using a local server or cloud service.
For advanced setups, refer to https://www.hackster.io.
10. What is the total cost of building this system?
The cost depends on the components used:
- ESP32 board: $5–$10
- Sensors: $10–$50
- Camera module: $5–$20
- Miscellaneous (cables, enclosures): $10–$30
The estimated total ranges from $30 to $100, making it affordable compared to commercial systems. Explore affordable component options at https://www.aliexpress.com.
Did you find this helpful? If you did, please stay tuned to our blog!!

