Drones have become an integral part of modern technology, with applications ranging from photography and videography to agriculture, research, and even disaster relief. But while drones can be expensive, building one yourself can save money and provide an excellent hands-on learning experience. Among the various microcontrollers available, the ESP32 stands out as a cost-effective and powerful option for building drones, especially for beginners.
The ESP32 is a versatile microcontroller with Wi-Fi and Bluetooth capabilities, making it perfect for drone building. Whether you’re a hobbyist looking to build your own quadcopter or an aspiring engineer wanting to learn about flight control systems, this guide will take you through the process of building a low-cost drone using the ESP32 microcontroller.
Chapter 1: Materials and Tools Needed
Before jumping into the technical details, it’s essential to gather all the necessary components and tools. The ESP32 microcontroller can be paired with a variety of other components to create a functional drone. Below is a list of materials and tools required to get started.
Required Components:
-
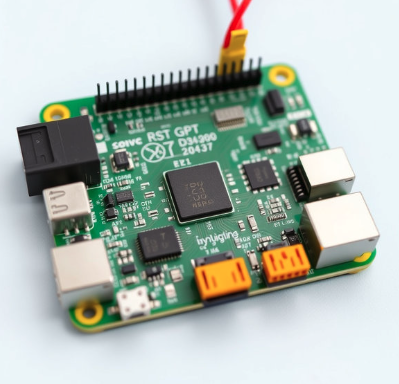
ESP32 Board: This microcontroller serves as the brain of your drone, handling tasks such as controlling motor speeds, reading sensor data, and managing communication.
-
Brushless Motors (x4): Brushless motors are preferred for drone flight because they are efficient and can provide higher power-to-weight ratios compared to brushed motors.
-
Electronic Speed Controllers (ESCs) (x4): ESCs are responsible for regulating the speed of each motor based on signals received from the ESP32. They convert the low-level control signals into the high-power signal required to drive the motors.
-
Propellers (x4): Propellers are crucial for generating lift. Make sure you choose the correct size and pitch based on your drone’s weight and motor specifications.
-
Flight Controller: While the ESP32 can act as the flight controller, you may want to use an external flight controller that is compatible with ESP32, especially for more complex setups. These controllers often include additional sensors like gyroscopes and accelerometers that can stabilize the drone during flight.
-
Power Distribution Board (PDB): This board distributes power from the battery to the ESCs and other components. It simplifies the wiring and ensures proper voltage distribution.
-
LiPo Battery: A Lithium Polymer (LiPo) battery is commonly used in drones due to its high energy density and light weight. Ensure you choose the appropriate voltage and capacity for your motors and flight time requirements.
-
Frame: The frame holds all of the components in place. You can either purchase a pre-made drone frame or design a custom frame using lightweight materials like carbon fiber or plastic.
-
GPS Module (Optional): If you want your drone to have autonomous capabilities, such as GPS waypoint navigation or return-to-home features, adding a GPS module is necessary.
-
FPV Camera (Optional): For first-person view (FPV) flying, you can install an FPV camera that will stream live video to your goggles or monitor.
Tools Needed:
-
Soldering Iron: Soldering is necessary to connect wires to the ESCs, motors, and flight controller. Ensure you use a quality soldering iron with a fine tip for precision.
-
Screwdrivers: To assemble the drone frame and mount the motors.
-
Heat Shrink Tubing: Use heat shrink tubing to insulate wires and prevent short circuits.
-
Multimeter: A multimeter is invaluable for testing connections and troubleshooting wiring issues.
-
Zip Ties: Use zip ties to secure wires and keep them organized.
-
Flight Test Area: A spacious, open area is essential for testing your drone. Ensure that it’s free from obstacles like trees, power lines, or buildings.
Chapter 2: Understanding the ESP32 Board
The ESP32 is a powerful and affordable microcontroller that offers dual-core processing, Wi-Fi, and Bluetooth connectivity. It is commonly used for Internet of Things (IoT) projects, but its capabilities make it an excellent choice for drone building.
Key Features of the ESP32 for Drone Building:
-
Dual-Core Processor: The ESP32 has a dual-core processor, which allows it to handle multiple tasks simultaneously. This is crucial for controlling a drone’s flight, managing sensors, and maintaining communication with remote controllers.
-
Wi-Fi and Bluetooth: The ESP32’s wireless capabilities enable remote control over Wi-Fi or Bluetooth, which is essential for controlling the drone from a smartphone or PC.
-
Multiple GPIO Pins: The ESP32 features a wide range of general-purpose input/output (GPIO) pins, which are used to connect the ESCs, motors, sensors, and other peripherals.
-
Onboard Flash Storage: This allows you to store the drone’s firmware and settings directly on the microcontroller, reducing the need for external storage devices.
-
Low Power Consumption: The ESP32 is power-efficient, which helps extend the flight time of your drone.
Setting Up the ESP32 Development Environment:
Before programming the ESP32, you’ll need to set up the development environment. The easiest way to do this is by using the Arduino IDE. Here are the steps to set up the ESP32:
- Download and install the Arduino IDE from the official website.
- Open the Arduino IDE and navigate to File > Preferences.
- Under Additional Boards Manager URLs, add the following link:
- Go to Tools > Board > Boards Manager and search for ESP32. Click Install to add support for the ESP32.
- Select the appropriate ESP32 board from Tools > Board (e.g., ESP32 Dev Module).
- You’re now ready to write and upload code to your ESP32!
Chapter 3: Wiring the Drone Components
Once you have all the components, the next step is to wire everything together. Below is a step-by-step guide to wiring the ESP32 to the other components.
1. Motors and ESCs:
Each motor is connected to its respective ESC. The ESC receives control signals from the ESP32 to adjust motor speeds. The wiring for each motor/ESC setup should look like this:
- Motor Wires to ESC: Connect the three motor wires to the corresponding terminals on the ESC.
- ESC to Power Distribution Board (PDB): Connect the ESC power wires to the PDB to distribute power from the battery to the ESCs.
- Signal Wires to ESP32: Connect the signal wire from each ESC to the GPIO pins of the ESP32. These signals control the motor speeds through PWM (Pulse Width Modulation).
2. Flight Controller (ESP32):
- ESC Control Pins: Connect each ESC’s signal wire to a GPIO pin on the ESP32. You will control the motors by sending PWM signals through these pins.
- Power: Ensure the ESP32 is powered through the PDB or a separate voltage regulator to avoid overloading the microcontroller.
3. GPS Module (Optional):
- GPS to ESP32: Connect the GPS module’s TX and RX pins to the ESP32’s RX and TX pins, respectively. This allows the ESP32 to receive GPS data for navigation.
4. FPV Camera (Optional):
- Video Signal: The video output of the FPV camera can be sent to a video transmitter or directly to a monitor or goggles.
- Power: Ensure the camera is powered via the PDB or a separate voltage regulator.
Use a multimeter to test each connection before powering up the drone. This ensures there are no short circuits or faulty wiring.
Chapter 4: Writing the Flight Control Software
With the hardware connected, it’s time to write the software that will control the drone. The ESP32 will handle motor control, sensor input, and communication with the remote control.
Basic Flight Control Code:
Below is an example of basic code for controlling the motors using PWM signals.
This code allows basic control over the motor speeds. It reads the input from a remote controller (over Wi-Fi or Bluetooth) and adjusts the motor speeds accordingly. As you progress, you can add more sophisticated control algorithms for flight stabilization, altitude hold, and navigation.
Chapter 5: Calibration and Testing
Before your drone can take off, it needs to be calibrated to ensure all components are working properly.
ESC Calibration:
Most ESCs have a calibration process that involves turning the throttle on and off to adjust their range. The ESCs will beep to indicate that they are calibrated.
Motor Direction Check:
Make sure the motors spin in the correct direction (clockwise or counterclockwise). If a motor spins in the wrong direction, simply swap two of its three wires to reverse the polarity.
Chapter 6: First Test Flight
After the drone is fully assembled and calibrated, it’s time for the first test flight. Start with low throttle to ensure everything is working correctly.
Safety Tips:
- Test in an open area with no obstacles.
- Ensure the battery is fully charged.
- Have a failsafe for your remote control to bring the drone back safely in case of signal loss.
Building a low-cost drone with the ESP32 microcontroller is a rewarding and educational project. Not only does it give you practical experience in electronics and programming, but it also introduces you to the fascinating world of flight control systems. Once you’ve completed your first successful flight, you can start adding more advanced features such as GPS navigation, autonomous flying, and FPV capabilities.
Visit our other website: https://synergypublish.com

