Why Use a Global Shutter for Security?
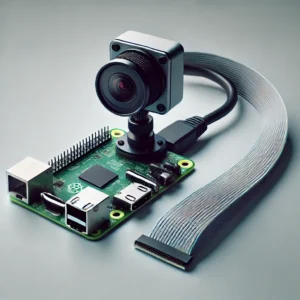
The Raspberry Pi’s versatility has led to countless DIY tech projects, and with the recent introduction of its global shutter camera, this device is even more suitable for security applications. Security footage requires high-quality image capture, especially when monitoring fast-moving scenes. The Raspberry Pi Global Shutter Camera, featuring a Sony IMX296 sensor, is designed to minimize distortions and capture sharp images, making it an ideal choice for both DIY enthusiasts and professionals looking to create a robust surveillance setup.
This guide will provide a step-by-step process for setting up the Raspberry Pi Global Shutter Camera for security purposes, covering everything from hardware requirements and software setup to advanced tips for low-light performance, motion detection, and data storage. With this setup, you’ll have a DIY security solution capable of capturing clear, undistorted footage in various environments.
Understanding Global Shutter Technology for Surveillance
Global shutter technology is essential for capturing clear images in motion-heavy environments. Unlike rolling shutter cameras, which capture frames line by line (causing a “jello effect” in fast-moving images), a global shutter captures the entire frame at once, preserving image integrity.
Benefits of a Global Shutter in Security Applications
-
Sharp Motion Capture: In security, it’s crucial to avoid distortion when capturing high-speed movements, especially in areas with vehicles or high foot traffic.
-
Enhanced Image Quality: The Sony IMX296 sensor in the Raspberry Pi Global Shutter Camera produces a resolution of 1.6 megapixels with a large pixel size (3.45μm × 3.45μm), ideal for clear, high-contrast images even in challenging light conditions.
-
Compatibility with C/CS Mount Lenses: The Raspberry Pi Global Shutter Camera uses a C/CS mount, allowing for a wide range of lens options. This flexibility means you can choose a lens tailored to your security needs, whether that’s a wide-angle view or a focused, narrow field.
Section 1: Preparing for Your Raspberry Pi Security Camera Setup
Essential Hardware for the Setup
To build a robust Raspberry Pi surveillance system with global shutter capabilities, you’ll need the following:
-
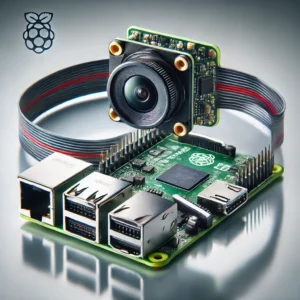
Raspberry Pi Board: Choose a model compatible with the Camera Serial Interface (CSI), like the Raspberry Pi 4 Model B or Pi Zero 2 W. Higher processing power will enhance performance, especially for complex applications like motion detection.
-
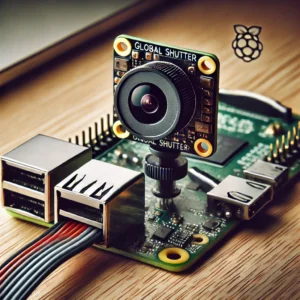
Raspberry Pi Global Shutter Camera Module: The heart of the setup, this module includes the Sony IMX296 sensor, optimized for capturing high-speed images without rolling shutter artifacts.
-
Lens Selection: Use a compatible C/CS-mount lens. Wide-angle lenses provide broader coverage for open spaces, while telephoto lenses are better suited for focused surveillance, such as monitoring entrances.
-
Power Supply and Storage: Ensure you have a reliable power source (5V, 3A recommended) and an SD card (32GB or larger) with Raspberry Pi OS. For extended video storage, consider an external USB or cloud storage.
Section 2: Initial Setup of Raspberry Pi OS and Camera Software
A robust software setup is crucial for optimal performance. Start by updating your Raspberry Pi OS and installing necessary libraries.
Step 1: Install Raspberry Pi OS and Update
- Download the latest Raspberry Pi OS from the official website.
- Flash it to an SD card (use software like Balena Etcher).
- Insert the SD card into your Pi, connect peripherals, and boot up.
Once booted, open a terminal and update the OS to the latest version:
Step 2: Install Camera Libraries
Install libcamera and Picamera2, which provide essential tools for working with the Raspberry Pi Global Shutter Camera.
Step 3: Configure the Camera
To enable the camera, use the Raspberry Pi configuration tool:
Navigate to Interface Options > Camera, select “Enable,” and reboot your device.
Section 3: Optimizing Camera Settings for Security
Resolution and Frame Rate Adjustments
For high-motion areas, adjust the frame rate and resolution settings for clear, smooth footage. Lower resolution settings can yield higher frame rates, crucial for tracking fast-moving objects without losing clarity.
Exposure and Shutter Speed
The Sony IMX296 sensor supports ultra-low exposure times (down to 30μs in well-lit conditions). This fast shutter speed is ideal for reducing motion blur in high-speed scenes. In your software, set exposure levels to match the light conditions of your environment.
Low-Light Enhancements
Security cameras often need to operate effectively in dim lighting. Using the “noir” (infrared) camera setting in dark environments can significantly enhance night vision. Pair this with IR illuminators for clear, grayscale footage in pitch-black settings.
Section 4: Implementing Motion Detection with OpenCV
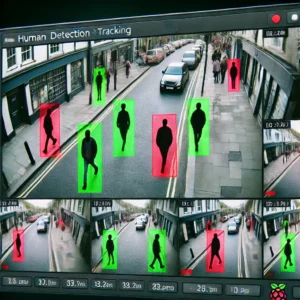
Motion detection enhances the effectiveness of your security camera by allowing it to record or alert only when movement is detected. OpenCV is a powerful library for Python that enables real-time video processing and motion detection.
Step 1: Install OpenCV
Install OpenCV on your Raspberry Pi by running:
Step 2: Write a Motion Detection Script
Create a simple motion detection script in Python to monitor changes in the frame. Here’s an example code snippet:
This script compares consecutive frames, detects movement, and displays it on screen. Adjust the contour area for sensitivity.
Enhancing Motion Detection Accuracy
- Light Control: Fluctuating light can falsely trigger detection. If possible, control ambient lighting to reduce unnecessary triggers.
- Fine-Tune Sensitivity: Experiment with contour areas and threshold values to detect only relevant motion, ignoring smaller changes.
Section 5: Data Storage Solutions
Local Storage on Raspberry Pi
For small-scale setups, storing footage on the Raspberry Pi’s SD card or an external USB drive can suffice. However, consider the limited storage space and set automated deletion schedules for old footage to avoid running out of space.
Cloud Integration with Rclone
For remote access to footage, integrate cloud storage with Rclone. This software enables you to sync footage with services like Google Drive, Dropbox, or Amazon S3.
Install Rclone:
Configure Rclone with your cloud service credentials and set up automated uploads:
This way, you’ll have backups in the cloud accessible from anywhere.
Section 6: Securing Your Raspberry Pi Surveillance Setup
To protect your footage and system, secure your Raspberry Pi with these steps:
Step 1: Update and Change Default Passwords
Make sure your Pi OS is up-to-date, and immediately change the default pi user password.
Step 2: Configure a Firewall
Use ufw to set up a firewall, limiting access only to authorized devices:
Step 3: Enable Encryption
If storing sensitive data locally, use encryption tools to protect files.
Step 4: Remote Access with SSH Keys
Enable secure remote access using SSH keys instead of passwords. Generate SSH keys on your computer and add them to your Pi.
Section 7: Testing and Troubleshooting
Before fully deploying your system, test it in various lighting and motion scenarios to identify potential issues.
Testing Low-Light Performance
Simulate different lighting conditions and tweak settings to find the best configuration. IR lighting can help in total darkness if using the noir Pi setting.
Common Troubleshooting Tips
- Camera Not Detected: Verify cables and check that the camera module is enabled in
raspi-config. - Storage Full: Set up automatic deletions or expand storage to prevent system crashes.
- High Latency: Optimize frame rate and resolution or consider upgrading to a higher-performance Raspberry Pi model.
Setting up a Raspberry Pi Global Shutter Camera for security applications provides a cost-effective solution for capturing high-quality, undistorted footage. With a robust setup, you can monitor areas effectively, capture crucial details, and store footage securely. Whether you’re using this setup for home surveillance or a DIY security project, the flexibility of the Raspberry Pi and the power of the global shutter camera make this an ideal solution.
Visit our other website: https://synergypublish.com


