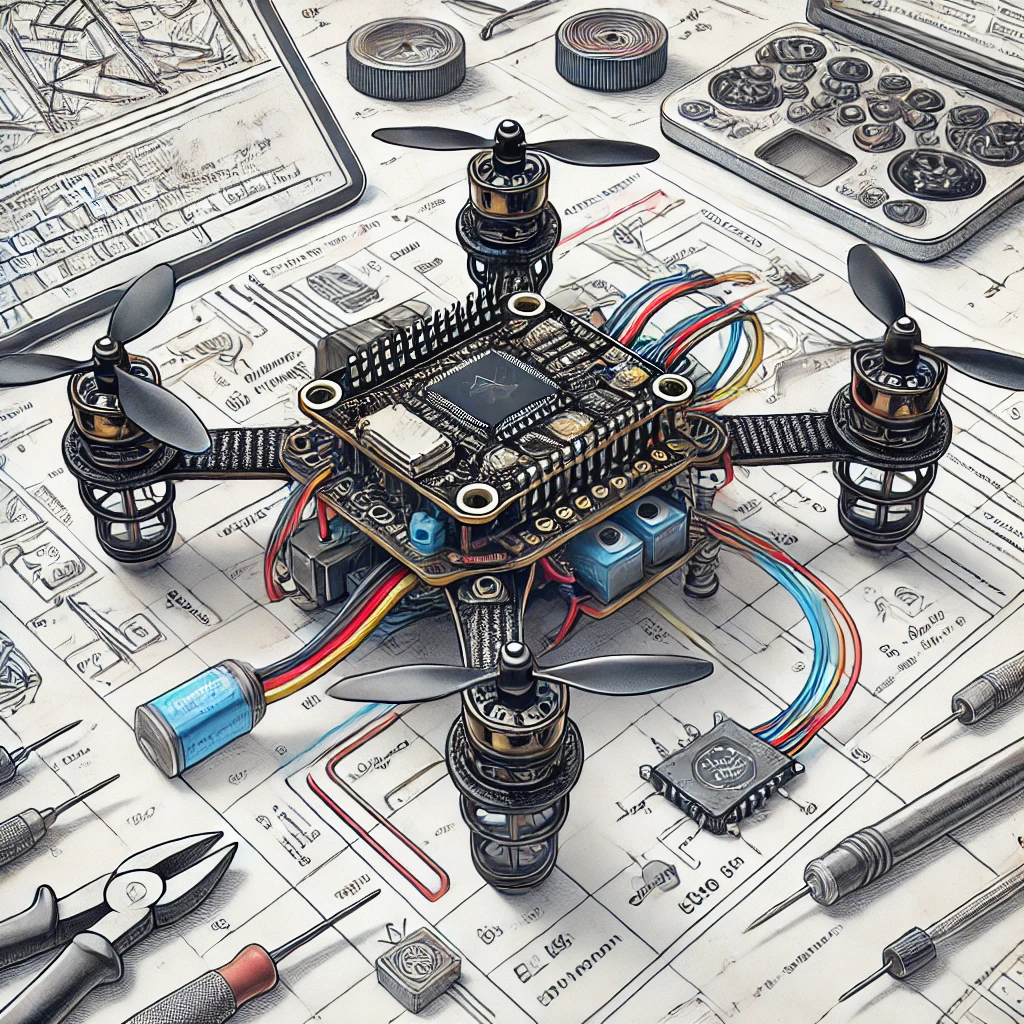
Learn how to build a low-cost drone using the ESP32 microcontroller. This step-by-step guide covers all the necessary components, setup, and coding for a successful project.
Building a drone from scratch may seem like a challenging project, but with the help of the ESP32 microcontroller, the process becomes manageable and affordable. The ESP32 is a powerful yet cost-effective microcontroller with Wi-Fi and Bluetooth capabilities, making it an excellent choice for building DIY projects such as drones. In this article, we’ll guide you step-by-step through the process of building a low-cost drone using the ESP32, covering everything from setting up the hardware to writing the code that controls the flight.
Materials You’ll Need
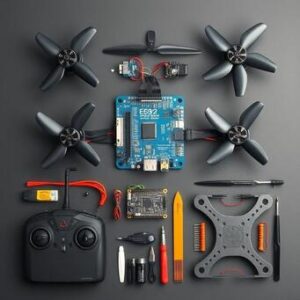
Before diving into the build, it’s important to gather all the necessary components. These are the key materials you’ll need for the project:
- ESP32 Development Board: This serves as the main controller for the drone.
- Brushless DC Motors (4): These motors power the drone and provide thrust.
- Electronic Speed Controllers (ESCs) (4): ESCs control the speed and direction of each motor.
- Propellers (4): These are attached to the motors and generate lift.
- MPU6050 Sensor (Gyroscope + Accelerometer): Helps to maintain the stability and orientation of the drone.
- LiPo Battery (3S or 4S): Powers the drone’s electronics and motors.
- RC Transmitter and Receiver: Used to control the drone remotely.
- Drone Frame: The structure that holds all the components together.
- Power Distribution Board (PDB): Distributes power from the battery to the ESCs and other components.
- Wires, Connectors, and Miscellaneous Tools: For wiring and connecting all components.
With these components in hand, you’re ready to get started on assembling your drone.
Step 1: Assemble the Drone Frame and Mount the Motors
1.1 Preparing the Drone Frame
Start by assembling the frame for your drone. The frame is the skeleton that will hold all the components, so it needs to be sturdy yet lightweight. You can either purchase a pre-built drone frame or construct one yourself using materials like plastic or carbon fiber. The frame should be spacious enough to mount the motors, sensors, and power distribution board without any wires getting tangled. Ensure the frame has a clean, organized layout for easy wiring and mounting.
1.2 Mounting the Motors
After the frame is assembled, it’s time to mount the motors. Secure each of the four brushless motors to the frame at opposite corners. Ensure that each motor is mounted tightly, as loose motors can affect the drone’s performance and flight stability. The motors should face upward, with their shafts pointing away from the center of the frame. This is crucial for balanced thrust and proper flight control.
1.3 Attaching the ESCs
The next step is to attach the ESCs to the frame. ESCs control the speed of each motor and are necessary for adjusting the drone’s thrust. Connect each motor to its corresponding ESC. Usually, each ESC has three wires—two for power and one for signal. Carefully connect the ESCs to the motors, making sure there are no loose connections that could interfere with the motor’s functionality. Each ESC should also be connected to the power distribution board (PDB) for power supply.
1.4 Setting up the Power Distribution Board
Now, attach the power distribution board (PDB) to the frame. The PDB acts as a hub that takes the power from the LiPo battery and distributes it to each ESC. Position the PDB carefully to avoid interference with the motors or other components. Most PDBs will have labeled connectors for the ESCs, making it easier to connect them. Secure the PDB in place using screws or zip ties, ensuring that the wires are organized and not prone to tangling.
1.5 Final Checks Before Hiring
Before moving on to the wiring process, double-check that all motors are firmly attached to the frame and that the ESCs are securely mounted to the PDB. Ensure there’s enough space for the battery, receiver, and other components. Properly plan the layout of your wiring to ensure a neat setup that minimizes the risk of wires catching on the propellers or moving parts during flight.
Step 2: Wiring the Components
2.1 Wiring the Motors and ESCs
The first step in the wiring process is to connect each motor to its ESC. Each motor has three wires, which are typically color-coded: red, black, and yellow (or sometimes blue, green, and yellow). Make sure that each motor’s wires are connected to the correct ESC. Use heat shrink tubing or electrical tape to secure the wires and prevent short circuits. Connect the power input of each ESC to the PDB, and ensure that the ground (GND) wires are also properly connected to the PDB.
2.2 Connecting the MPU6050 Sensor
The MPU6050 sensor is a critical part of the drone, as it provides data to stabilize the flight. The sensor communicates with the ESP32 via I2C, which is a communication protocol that allows multiple devices to communicate with each other using just two wires. Connect the VCC pin of the MPU6050 to the 3.3V pin on the ESP32, and the GND pin to the ground. The SDA and SCL pins on the MPU6050 should be connected to GPIO 21 and GPIO 22 on the ESP32, respectively.
2.3 Connecting the RC Receiver
The RC receiver is what allows you to control the drone remotely using an RC transmitter. The receiver typically has multiple channels that correspond to the throttle, pitch, yaw, and roll controls. For each channel, connect the signal pin from the receiver to the appropriate PWM input pins on the ESP32. For example, you can connect the throttle to GPIO 5, yaw to GPIO 6, pitch to GPIO 7, and roll to GPIO 8. Ensure that the ground pin from the receiver is connected to the ground on the ESP32.
2.4 Battery and Power Setup
Now, connect the LiPo battery to the PDB, ensuring that the polarity is correct. Use a 3S or 4S LiPo battery, depending on the voltage requirements of your ESCs. You’ll also need to secure the battery to the frame using Velcro straps or a similar mounting solution to prevent it from moving during flight. If the battery voltage is higher than the ESP32’s operating voltage (3.3V), use a voltage regulator to supply the correct voltage to the ESP32 and other components.
Step 3: Setting Up Arduino IDE for Programming the ESP32
3.1 Installing Arduino IDE
The next step is to install the Arduino IDE, which is necessary for programming the ESP32. Download the IDE from the official Arduino website. Once installed, launch the IDE and start setting it up for ESP32 programming.
3.2 Adding ESP32 Board to Arduino IDE
Before you can start programming, you’ll need to add support for the ESP32 board in the Arduino IDE. Open the Preferences window in Arduino IDE and in the Additional Boards Manager URLs field, paste the following URL:
Then, go to Tools > Board > Boards Manager, search for ESP32, and click Install.
3.3 Selecting the ESP32 Board and Port
Once the board package is installed, go to Tools > Board and select ESP32 Dev Module. Next, select the correct Port under Tools > Port. If your ESP32 is connected to your computer, you should see the port listed here.
Step 4: Writing the Code for the Drone
4.1 Code for Motor Control and Sensor Integration
Now that the hardware is assembled, it’s time to write the code that will control the drone’s motors and stabilize the flight using the MPU6050 sensor. Below is a basic example of how to control the drone’s motors and read data from the sensor.
4.2 Uploading the Code
Once you’ve written the code, click on the Upload button in Arduino IDE to compile and upload the code to the ESP32. Once uploaded, the drone should be ready for testing.
Step 5: Testing and Fine-Tuning
5.1 Performing Initial Tests
Before taking the drone on its maiden flight, it’s important to test it in a controlled environment. Make sure that all motors are spinning in the right direction, and check that the drone is responding to inputs from the RC transmitter.
5.2 Calibration and Adjustments
Depending on the behavior of the drone, you may need to fine-tune the code or adjust the hardware. For example, you may need to calibrate the MPU6050 sensor or adjust motor speeds for better stability. Experiment with the controls and make adjustments until you achieve stable flight.
5.3 First Flight
Finally, after performing a thorough check and ensuring everything is in place, take the drone outside for its first flight. Start with gentle control movements and gradually increase the difficulty as the drone stabilizes. Monitor the battery levels and avoid flying too far to prevent losing control.
Building a low-cost drone with the ESP32 is an exciting and rewarding project that can be accomplished with basic electronics and programming skills. By following the steps outlined in this guide, you can build a fully functional drone that is capable of stable flight. Whether you’re looking to enter the world of drone flying or create a custom drone for specific purposes, the ESP32 is an excellent choice for the job.
FAQs: Building a Low-Cost Drone Using ESP32
1. What is the ESP32, and why is it suitable for building a drone?
The ESP32 is a powerful microcontroller with integrated Wi-Fi and Bluetooth capabilities, making it an excellent choice for building drones and other IoT projects. It is low-cost, versatile, and supports various sensors and components that are essential for drone flight control. Learn more about ESP32 at the official Espressif website: https://www.espressif.com/en/products/socs/esp32.
2. What type of motor should I use for my drone?
For a DIY drone project, brushless DC motors (BLDC) are recommended because they provide more power and efficiency than brushed motors. You can find a variety of brushless motors from different online electronics suppliers, like https://www.digikey.com/ or https://www.sparkfun.com/.
3. Can I use any RC transmitter for my drone?
Yes, you can use any RC transmitter, but it must have enough channels to control all the necessary functions such as throttle, yaw, pitch, and roll. A 4-channel or higher RC transmitter will work well. You can check out various RC transmitters at https://www.amazon.com/ or https://hobbyking.com/.
4. Where can I buy the components for my drone?
You can purchase the components for your drone from a variety of online electronics retailers. Some popular options include:
- SparkFun Electronics: https://www.sparkfun.com/
- Adafruit: https://www.adafruit.com/
- Digi-Key: https://www.digikey.com/
- HobbyKing: https://hobbyking.com/
5. What software do I need to program the ESP32?
To program the ESP32, you’ll need the Arduino IDE, which is free and available for download at https://www.arduino.cc/en/software. Additionally, you’ll need to install the ESP32 board definitions within the IDE as described in the steps above.
6. What is the MPU6050 sensor, and why is it important?
The MPU6050 is a 6-axis gyroscope and accelerometer used to detect the orientation and movement of the drone. It helps stabilize the flight by providing feedback about the drone’s position and balancing adjustments. The sensor can be purchased from various electronics suppliers such as https://www.adafruit.com/product/3886.
7. How do I upload the code to the ESP32?
Once you’ve written the code in the Arduino IDE, you can upload it to the ESP32 by clicking the Upload button in the Arduino IDE. Ensure your ESP32 board is connected via USB, and that the correct board and port are selected. Detailed instructions can be found on the Espressif ESP32 documentation.
8. What are the potential issues I might face during drone testing?
Common issues include poor stability, motors not spinning in the correct direction, or problems with the power supply. To address these issues:
- Check the wiring and motor connections.
- Ensure the MPU6050 sensor is calibrated properly.
- Verify the battery voltage is appropriate for all components.
- Test motor speeds and adjust the code accordingly.
9. How do I calibrate the MPU6050 sensor?
You can calibrate the MPU6050 sensor by using a code snippet that reads raw sensor data and compensates for drift. There are several calibration guides and libraries available on GitHub to make this process easier.
10. Can I use a different microcontroller instead of the ESP32?
Yes, you can use other microcontrollers such as the Arduino Uno or Raspberry Pi for drone projects, but the ESP32 is particularly well-suited for this due to its built-in Wi-Fi and Bluetooth support, making remote control and telemetry more convenient. For more details about microcontrollers, check out https://www.raspberrypi.org/ or https://www.arduino.cc/.
11. How do I ensure my drone is safe to fly?
To ensure a safe flight, make sure to:
- Perform pre-flight checks to verify that all components are properly connected.
- Conduct the first flight in a spacious, open area free from obstructions.
- Keep the drone under control by adjusting the motor speeds and calibrating sensors as necessary.
- Always check the battery charge before flying and use a low-voltage cutoff to prevent crashes due to power loss.
For more information on drone safety, visit https://www.faa.gov/uas/.
Did you find this helpful? if you did, please share and stay tuned to our blog!!
Feel free to visit master3dp.com for all your 3D printing know-how!!

