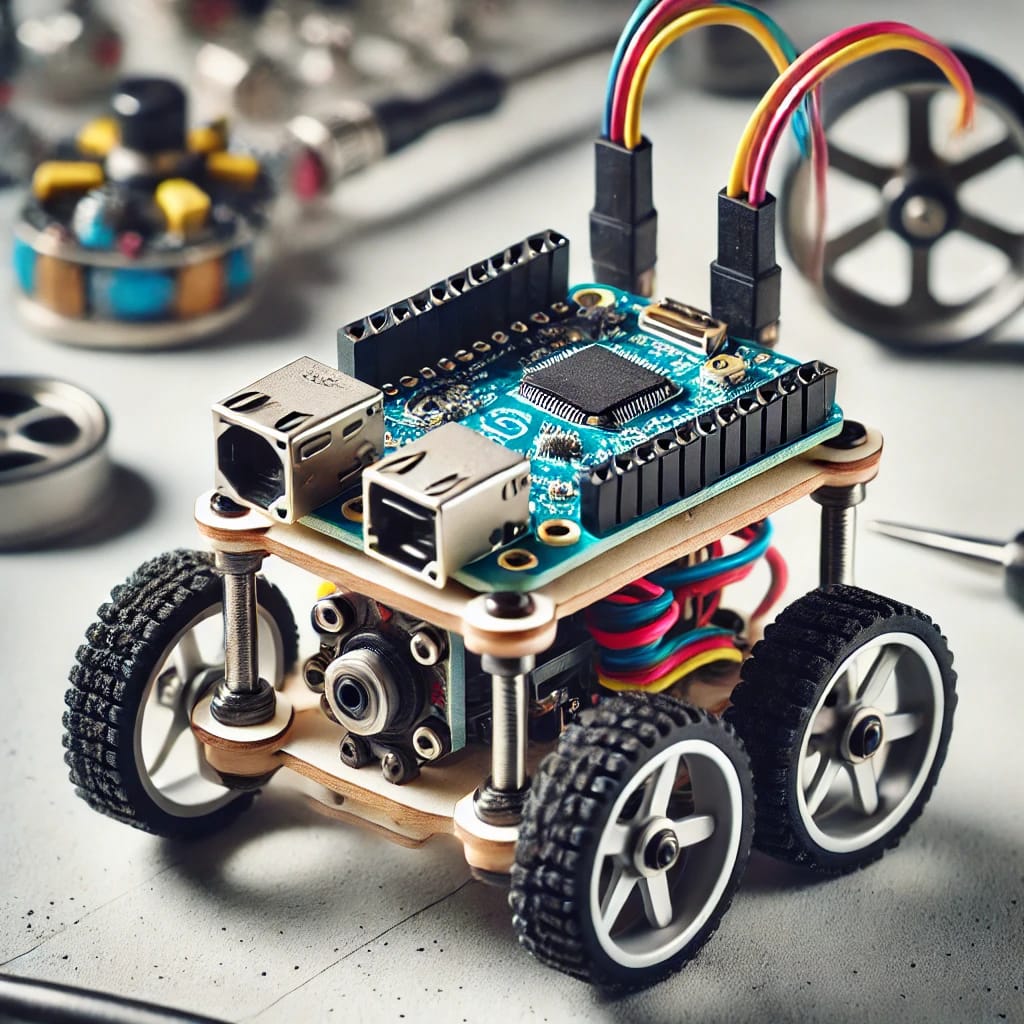
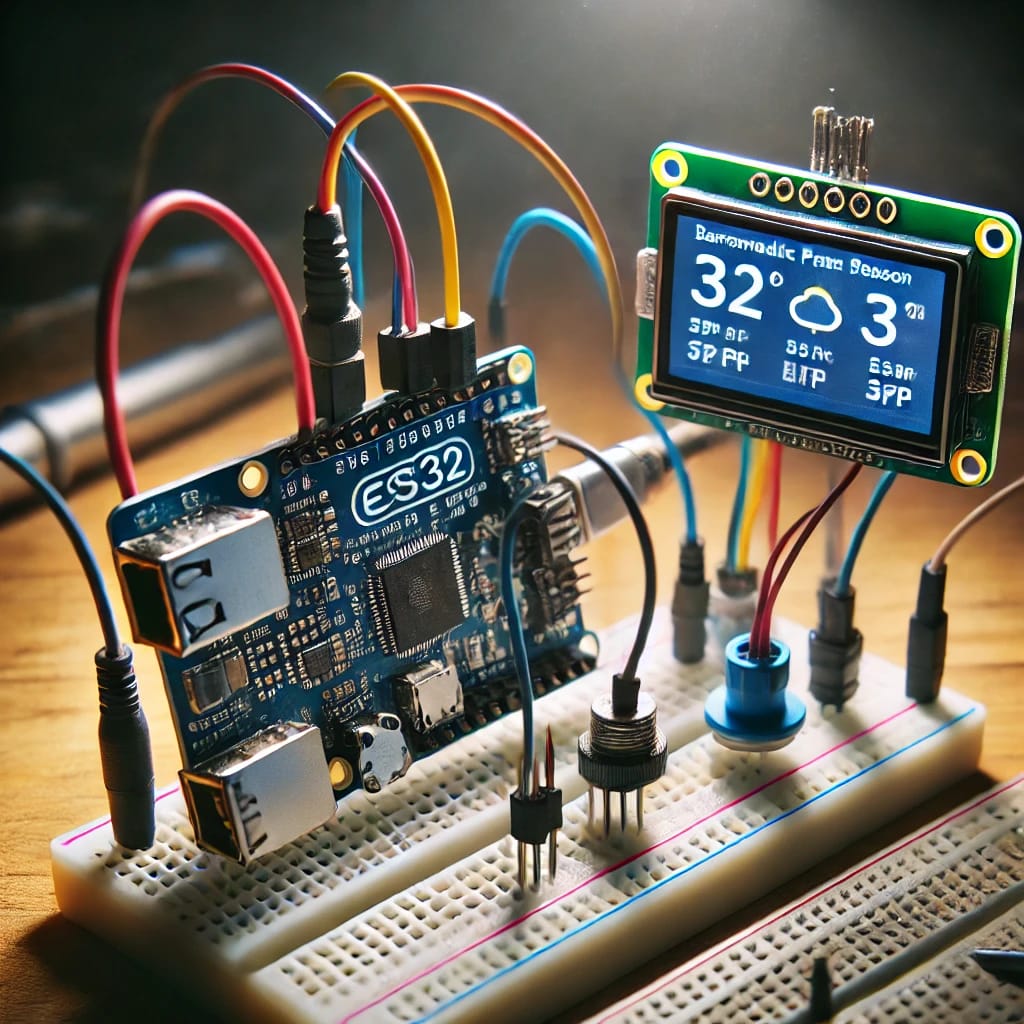
Learn how to transform your ESP32 microcontroller into a fully functional robot with this detailed step-by-step guide. Explore hardware setup, programming, sensor integration, and troubleshooting.
The Power of ESP32 in Robotics
The ESP32 is a highly versatile microcontroller that has become increasingly popular among hobbyists and developers. With its built-in Wi-Fi and Bluetooth capabilities, it is ideal for creating connected devices such as robots. This guide will walk you through the entire process of transforming an ESP32 into a fully functioning robot, covering everything from hardware setup to programming and sensor integration. Whether you’re a beginner or experienced in robotics, this guide will provide you with clear instructions on how to bring your robot to life using the ESP32.
Choosing the Right Components for Your Robot
Before diving into the setup process, it’s important to gather the right components. A robot requires several pieces of hardware that will allow it to move, interact with its environment, and execute commands. Here’s a list of the essential components you’ll need to build your ESP32 robot:
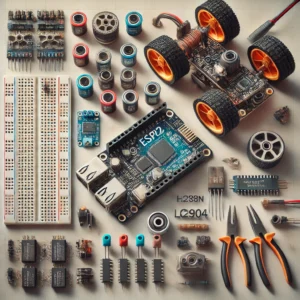
- ESP32 Dev Board: This will be the brain of your robot, capable of connecting to Wi-Fi and Bluetooth, and controlling various sensors and actuators.
- DC Motors: These will provide the movement for your robot. Two motors (for a two-wheel drive robot) or four motors (for a four-wheel drive robot) are typically used.
- Motor Driver (L298N): This board controls the speed and direction of the DC motors. It acts as an intermediary between the ESP32 and the motors.
- Ultrasonic Sensor (HC-SR04): An ultrasonic sensor helps your robot detect obstacles by measuring the distance to objects.
- Wheels and Chassis: You’ll need wheels for your motors to attach to, and a chassis to mount all your components.
- Battery: A power source, typically a LiPo battery, will power the ESP32 and motors.
- Jumper Wires and Breadboard: To make connections between the ESP32, motor driver, sensors, and other components.
By gathering these components, you will have everything needed to assemble a basic robot. Some additional components like a camera module or extra sensors can be added later depending on the complexity of your robot.
Assembling the Hardware: Wiring the ESP32 to Motors and Sensors
Now that you have all the necessary components, it’s time to assemble your robot. The first step is to wire everything correctly, as a proper connection ensures that all components will work together seamlessly. Here’s a step-by-step guide to wiring the ESP32 to the motors and sensors:
-
Motor Wiring:
- Connect your DC motors to the L298N motor driver. The motor driver will have pins for motor output (out1, out2, out3, out4) and input pins (in1, in2, in3, in4) that control motor movement.
- Wire the input pins (in1, in2, in3, in4) to GPIO pins on the ESP32. These will control the movement of the motors (forward, backward, left, right).
-
Ultrasonic Sensor Wiring:
- Connect the Trig pin of the ultrasonic sensor to a GPIO pin on the ESP32 (e.g., GPIO 12).
- Connect the Echo pin to another GPIO pin (e.g., GPIO 13).
- Connect the VCC and GND pins of the ultrasonic sensor to the ESP32’s 5V and GND pins.
-
Power Supply:
- Connect the LiPo battery to the motor driver and ESP32, ensuring that the battery’s voltage is suitable for both the motors and the ESP32. Typically, the motor driver will need 5-12V, while the ESP32 works with 3.3V.
-
Chassis Setup:
- Attach the motors to the robot’s chassis and ensure that the wheels are securely attached. Make sure that the ESP32 is mounted securely, with enough room for all the connections.
Programming the ESP32 to Control the Motors
With the hardware assembled, the next step is to program the ESP32 to control the robot’s movement. The ESP32 can be programmed using the Arduino IDE, which is widely used and beginner-friendly. Here’s how to set up the environment and code to make your robot move:
-
Install the ESP32 Board in Arduino IDE:
- Open Arduino IDE and navigate to File > Preferences. Add the following URL to the Additional Boards Manager URLs field:
https://dl.espressif.com/dl/package_esp32_index.json. - Go to Tools > Board > Boards Manager and search for ESP32. Install the board support.
- Open Arduino IDE and navigate to File > Preferences. Add the following URL to the Additional Boards Manager URLs field:
-
Write the Code:
Here’s an example code to control your robot’s movement:
// Motor control pins

#define IN1 32

#define IN2 33

#define IN3 25

#define IN4 26
void setup() {

  pinMode(IN1, OUTPUT);

  pinMode(IN2, OUTPUT);

  pinMode(IN3, OUTPUT);

  pinMode(IN4, OUTPUT);

}
void loop() {

  moveForward();

  delay(2000);  // Move forward for 2 seconds

  stopMovement();

  delay(1000);  // Stop for 1 second

  moveBackward();

  delay(2000);  // Move backward for 2 seconds

  stopMovement();

}
void moveForward() {

  digitalWrite(IN1, HIGH);

  digitalWrite(IN2, LOW);

  digitalWrite(IN3, HIGH);

  digitalWrite(IN4, LOW);

}
void moveBackward() {

  digitalWrite(IN1, LOW);

  digitalWrite(IN2, HIGH);

  digitalWrite(IN3, LOW);

  digitalWrite(IN4, HIGH);

}
void stopMovement() {

  digitalWrite(IN1, LOW);

  digitalWrite(IN2, LOW);

  digitalWrite(IN3, LOW);

  digitalWrite(IN4, LOW);

}
- Upload the Code:
- Connect the ESP32 to your computer via USB and upload the code to the ESP32 using the Upload button in the Arduino IDE.
- Once uploaded, your robot should start moving forward and backward according to the program.
Integrating Obstacle Avoidance Using Ultrasonic Sensor
To make your robot smarter, you can integrate an ultrasonic sensor for obstacle avoidance. The ultrasonic sensor will measure the distance to objects in front of the robot and prevent it from colliding with them.
- Connect the Sensor:
- Wire the ultrasonic sensor’s Trig and Echo pins to GPIO pins on the ESP32 (as done in the previous steps).
- Modify the Code for Obstacle Detection:
You will need to update your code to include logic for reading distance from the ultrasonic sensor and stopping or avoiding obstacles.
#define TRIG_PIN 14

#define ECHO_PIN 12
void setup() {

  pinMode(TRIG_PIN, OUTPUT);

  pinMode(ECHO_PIN, INPUT);

  Serial.begin(115200);

}
void loop() {

  long duration, distance;

  digitalWrite(TRIG_PIN, LOW);

  delayMicroseconds(2);

  digitalWrite(TRIG_PIN, HIGH);

  delayMicroseconds(10);

  digitalWrite(TRIG_PIN, LOW);
  duration = pulseIn(ECHO_PIN, HIGH);

  distance = (duration / 2) * 0.0344;  // Convert to cm
  if (distance < 10) {

    stopMovement();

  } else {

    moveForward();

  }

}
- Test the System:
- After uploading the updated code, your robot should stop when an obstacle is detected within a distance of 10 cm.
Adding Remote Control with Wi-Fi Using a Web Interface
One of the most exciting features of the ESP32 is its built-in Wi-Fi capability. You can use this feature to control your robot remotely via a simple web interface. By creating a basic web server, you can send movement commands from your smartphone, tablet, or PC.
- Set Up the Web Server:
Use the ESP32’s Wi-Fi capabilities to host a web server. You can send HTTP requests to control the robot’s movement. Here’s an example of setting up a basic web server:
#include <WiFi.h>

#include <ESP32WebServer.h>
const char* ssid = "your_SSID";

const char* password = "your_PASSWORD";

ESP32WebServer server(80);
void setup() {

  Serial.begin(115200);

  WiFi.begin(ssid, password);

  while (WiFi.status() != WL_CONNECTED) {

    delay(1000);

    Serial.println("Connecting...");

  }

  Serial.println("Connected to Wi-Fi");
  server.on("/forward", HTTP_GET, forward);

  server.on("/stop", HTTP_GET, stop);

  server.begin();

}
void loop() {

  server.handleClient();

}
void forward() {

  moveForward();

}
void stop() {

  stopMovement();

}
-
Control via Web Interface:
- Create a simple HTML page with buttons for controlling the robot. Each button will send a request to the ESP32 web server to control the movement.
-
Test the Remote Control:
- After uploading the code, access the ESP32’s IP address on your web browser. You should be able to control the robot’s movements remotely.
Troubleshooting and Final Adjustments
Once your robot is up and running, there might be a few issues that require troubleshooting. Here are some common problems and their solutions:
-
ESP32 Not Connecting to Wi-Fi:
- Check your Wi-Fi credentials to ensure they’re correct. Make sure the ESP32 is within range of your Wi-Fi router.
-
Motors Not Moving:
- Double-check the motor wiring. Ensure that the motor driver is receiving power and the GPIO pins are correctly configured in your code.
-
Sensor Not Detecting Obstacles:
- Verify the ultrasonic sensor wiring and ensure the Trig and Echo pins are properly connected. Check the sensor’s range and orientation.
By following these steps, you should be able to create a fully functional robot using your ESP32. From assembly to programming and troubleshooting, this guide has provided you with the tools and knowledge necessary to build a robot that is both fun and educational.
Expanding the Robot’s Capabilities: Adding More Features
Once you’ve successfully built a basic robot using the ESP32, you might want to enhance its functionality further. Here are a few advanced features you can implement to take your robot to the next level:
-
Adding a Camera for Live Streaming or Image Recognition:
To enable your robot to “see” its environment, you can integrate a camera module like the ESP32-CAM. This will allow the robot to stream live video or even perform basic image recognition tasks. The camera can be connected to the ESP32 via the GPIO pins, and you can program it to capture images or stream video to a web interface. This could be especially useful for tasks such as surveillance or object detection. -
Voice Control Integration:
You can also incorporate voice control into your robot using a microphone and speech recognition library. With services like Google Assistant or Amazon Alexa, you can send voice commands to control the robot. This adds a whole new level of interactivity and makes the robot easier to control hands-free. -
Advanced Sensor Integration for More Complex Tasks:
Your robot can be equipped with more sensors like IR sensors, temperature sensors, gyroscopes, and accelerometers to enable tasks such as line-following, environmental monitoring, or maintaining balance in a robot. These sensors can be used to create more complex behaviors and smarter robots that respond dynamically to their surroundings. -
Battery Management System (BMS):
To ensure your robot can operate for long durations without constant recharging, adding a battery management system is a good idea. This will allow you to monitor the robot’s battery status, optimize its power usage, and ensure that the robot doesn’t run out of power unexpectedly during operation. You can also add features to automatically return the robot to a charging station when the battery is low. -
Autonomous Navigation with AI:
As you get more advanced, you could implement algorithms for autonomous navigation using AI. Machine learning models like Reinforcement Learning can be used to teach your robot how to navigate through obstacles and make decisions on the fly. This would allow the robot to make more independent choices, such as finding its way around a room or avoiding complex obstacles.
Testing and Calibration of the Robot
After integrating new features, it’s crucial to test and calibrate your robot to ensure everything works as expected. Here are some tips for thorough testing:
-
Test the Movement and Motor Controls:
Ensure that the motor drivers are correctly controlling the motors and that the robot moves in the expected directions (forward, backward, left, right). You can run a simple program to test each direction, checking for any issues like slow movement or failure to turn. -
Calibrate the Ultrasonic Sensor:
Ultrasonic sensors might require some calibration to ensure accurate distance measurements. You can adjust the code to tweak the timing of the sensor or use different models of ultrasonic sensors if necessary. You should test the sensor by placing objects at various distances and ensuring the robot stops or avoids them accordingly. -
Test the Web Interface:
If you’re using a web interface for remote control, make sure the interface is responsive and commands are being executed as expected. You should test the system on various devices (smartphone, tablet, computer) to ensure compatibility and ease of use. -
Check Battery Life:
Test the robot’s battery life under normal usage. If the battery drains too quickly, consider optimizing the power consumption of the robot, either by choosing more efficient motors or by adjusting the code to reduce the frequency of tasks that require heavy computation. -
Fine-tune Sensor and Movement Algorithms:
As you test, you might notice areas for improvement in your robot’s algorithms. You may need to adjust the speed or sensitivity of sensors like ultrasonic or infrared sensors to improve accuracy or reaction time. Testing and fine-tuning these settings will help ensure that your robot performs reliably in different environments.
Future Projects and Enhancements
Now that you’ve built a functional ESP32 robot, you might be inspired to take it even further. Here are some ideas for future projects and enhancements you could try:
-
Robot Arm Integration:
Add a robotic arm to your robot to give it the ability to pick up objects. By using a servo motor and the right actuators, you can create a robotic arm that can grasp and move objects, further increasing the robot’s functionality. -
Path Following Robot:
Turn your robot into a path-following bot by integrating an IR sensor array. These sensors can track a line on the ground (usually black tape on a white surface) and allow the robot to follow the path autonomously. You can use a simple PID (Proportional-Integral-Derivative) controller to maintain the robot’s position along the line. -
Autonomous Navigation:
As mentioned earlier, you can integrate AI or machine learning techniques to create a robot capable of autonomous navigation. This involves using cameras and sensors like LiDAR to map its environment and navigate around it without human intervention. Over time, this will transform your simple robot into a fully autonomous vehicle capable of learning and adapting to its surroundings. -
Interactive Social Robot:
Add speech recognition and a speaker to your robot, and you can create an interactive social robot. This robot could respond to voice commands, engage in conversations, or even perform actions based on questions and commands. It can be a fun project to create a robot that can interact with people in a more human-like way. -
Swarm Robotics:
Another advanced idea is to create a system of multiple robots that can work together. This involves programming the robots to communicate with each other and collaborate to complete tasks. For example, a group of robots could clean a room or perform search-and-rescue tasks in unison.
Bringing Your ESP32 Robot to Life
Transforming an ESP32 into a robot is an exciting and rewarding project that allows you to explore robotics, programming, and hardware integration. By following the steps outlined in this guide, you can build a basic robot, enhance it with sensors, add Wi-Fi control, and even introduce advanced capabilities like AI-driven navigation and autonomous decision-making.
The possibilities are endless when it comes to building and expanding your ESP32-based robot. Whether you want to create a simple obstacle-avoiding bot or a complex, AI-driven robot, this guide provides the foundation to help you succeed. With the ESP32’s power and flexibility, you can continue experimenting and adding features to your robot, making it a dynamic, responsive, and truly autonomous creation. Happy building!
FAQs:
-
How long will it take to build an ESP32 robot? Building a basic ESP32 robot can take anywhere from a few hours to a couple of days, depending on your experience level and the complexity of the robot. Adding additional features like obstacle avoidance or Wi-Fi control may take longer. For more detailed tutorials on getting started with ESP32, visit https://www.espressif.com.
-
Can I use other microcontrollers instead of ESP32? Yes, other microcontrollers such as Arduino or Raspberry Pi can be used for similar projects, but the ESP32 is unique due to its built-in Wi-Fi and Bluetooth capabilities, which make it easier for connected projects. For a comparison of different microcontrollers, check out https://www.tomshardware.com/review/understanding-microcontrollers.
-
How can I power my ESP32 robot? You can use a rechargeable LiPo battery to power the ESP32 and motors. Be sure to choose a battery with enough voltage and capacity to meet the power needs of your motors and the ESP32. For more information on choosing the right battery, visit https://www.sparkfun.com/products/13810.
-
Can I add more sensors to my robot? Yes, you can add additional sensors like temperature sensors, cameras, and IR sensors to enhance your robot’s functionality. You will need to wire them to the ESP32 and modify your code to handle the new inputs. To learn about available sensors and their integration with ESP32, visit https://randomnerdtutorials.com.
-
What programming language do I need to know to build an ESP32 robot? The most common programming language used for ESP32 robots is C++ with the Arduino IDE. However, you can also use Python with libraries like MicroPython for more advanced functionality. You can get started with MicroPython for ESP32 at https://micropython.org.
-
How do I upload code to the ESP32? You can upload code to the ESP32 using the Arduino IDE or any other compatible IDE. To do this, you need to select the correct board in the IDE and use a USB cable to connect the ESP32. Check out a step-by-step guide for uploading code on the official ESP32 site: https://www.espressif.com/en/products/socs/esp32/resources.
-
Can I use ESP32 for wireless control of the robot? Yes, the ESP32 is excellent for wireless control due to its built-in Wi-Fi and Bluetooth capabilities. You can program the robot to be controlled via a web interface, smartphone app, or even through Bluetooth. For detailed instructions, visit https://randomnerdtutorials.com/esp32-bluetooth-server/.
-
What tools do I need to build an ESP32 robot? To build the robot, you’ll need basic tools such as a soldering iron, wire cutters, and pliers. You’ll also need components like motors, sensors, and a chassis. A complete list of recommended tools can be found at https://www.sparkfun.com.
-
Can I make a fully autonomous robot with ESP32? Yes, ESP32 can be used for autonomous robots. By integrating sensors like ultrasonic, cameras, or LiDAR, you can program your robot to make decisions and navigate without human intervention. To learn more about autonomous robot projects, visit https://www.robotshop.com.
-
Where can I find additional resources and tutorials for ESP32 robotics? There are numerous resources available for learning about ESP32 robotics, including official tutorials, blogs, and online courses. Some great places to start include https://www.instructables.com and https://www.udemy.com.
Did you find this helpful? If you did, please stay tuned to our blog!!!

