Using Raspberry Pi 5 and OpenCV: Step by Step Guide

Learn to configure the Raspberry Pi, connect a camera, capture face images, and implement recognition with real-time alerts, all while enhancing your skills in computer vision.


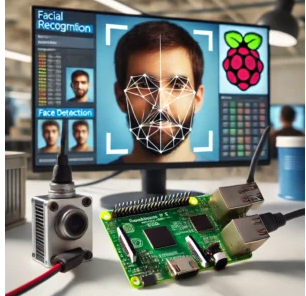
Facial recognition has rapidly evolved from being an exclusive technology to a practical, affordable solution for everyday use. Leveraging the processing power of Raspberry Pi 5 and the capabilities of OpenCV, you can create a robust facial recognition system for home or workspace security. This project empowers you to identify faces, send alerts, and control access effectively.

The Raspberry Pi 5’s upgraded hardware enables real-time processing, making it ideal for facial recognition tasks. When paired with OpenCV’s computer vision tools, the combination offers flexibility, affordability, and precision. Unlike commercial security systems, this DIY solution is customizable to suit specific needs.

This detailed guide explores every aspect of building your system. From setting up hardware to writing Python code for detection and recognition, you will gain the knowledge to deploy a functional and expandable security solution. By enhancing its capabilities, such as integrating a database or enabling remote alerts, you can adapt the system for advanced use cases.

Why Choose Raspberry Pi 5 and OpenCV?

The Raspberry Pi 5’s cutting-edge hardware makes it a prime choice for facial recognition applications. Its powerful processor supports real-time image processing, and its increased memory and improved I/O capabilities make it a robust platform for handling high-resolution data.

Key Benefits:

  1. Affordability: Raspberry Pi 5 is significantly less expensive than commercial systems, allowing for budget-friendly setups.
  2. Flexibility: OpenCV offers a range of tools for face detection, recognition, and image processing.
  3. Customizability: Users can tailor the system for specific security needs, such as multi-user environments or specific alert thresholds.
  4. Real-Time Performance: The upgraded hardware ensures the system processes data without delays.
  5. Scalability: The modular design allows for the easy addition of features, such as object detection or gesture recognition.

Using OpenCV with Raspberry Pi 5 combines affordability and power, making this project accessible to hobbyists, students, and professionals alike.

Essential Components for Your System

A successful facial recognition system requires thoughtful selection of components. Here are the essentials:

  1. Raspberry Pi 5: The central processor for capturing and analyzing images.
  2. Camera Module: Either the Pi Camera Module or a USB-compatible camera for capturing input.
  3. MicroSD Card (32GB or higher): For storing the operating system, software, and image data.
  4. Power Supply: A stable USB-C power source to ensure reliable performance.
  5. OpenCV Library: The primary tool for implementing computer vision features.
  6. Display (Optional): For monitoring live video and recognition results.
  7. Speaker or Buzzer (Optional): To signal unauthorized access attempts.
  8. Additional Accessories: Relays, lights, or external sensors for expanding functionality.

Step 1: Setting Up Raspberry Pi 5

1. Install Raspberry Pi OS:
Download Raspberry Pi OS from the official website and flash it onto your microSD card using tools like Balena Etcher. Boot up the Pi, and complete the initial configuration.

2. Update System Software:
Ensure your system is up to date to avoid compatibility issues. Run:

bash
sudo apt update
sudo apt upgrade

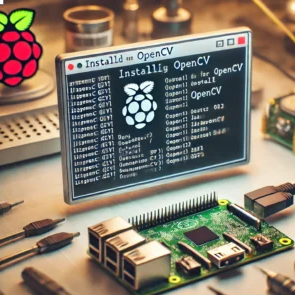
3. Install OpenCV:
Install OpenCV, which provides tools for image processing and face recognition. Install necessary libraries:

bash
sudo apt install build-essential cmake pkg-config
sudo apt install libjpeg-dev libtiff-dev libpng-dev

Clone the OpenCV repository and build it:

bash
git clone https://github.com/opencv/opencv.git
cd opencv
mkdir build
cd build
cmake ..
make -j4
sudo make install

Step 2: Setting Up and Testing the Camera

  1. Connect the Camera Module: Attach the Pi Camera Module or connect a USB camera.
  2. Enable the Camera:
    bash
    sudo raspi-config

    Navigate to Interfacing Options and enable the camera.

  3. Test Camera Functionality:
    Capture a test image to verify the setup:

    bash
    raspistill -o test_image.jpg

Step 3: Preparing Images for Recognition

  1. Organize Data Storage:
    Create directories to store known face images:

    bash
    mkdir -p ~/facial_recognition/known_faces
  2. Capture Training Data:
    Capture multiple images of each subject for accurate training:

    bash
    raspistill -o ~/facial_recognition/known_faces/person_name/image1.jpg
  3. Preprocess Images:
    Resize and convert images to grayscale for efficient processing using OpenCV tools.

Step 4: Writing the Python Code

1. Import Libraries:

python
import cv2
import numpy as np

2. Load and Train Data:
Use OpenCV’s LBPH algorithm for training:

python
recognizer = cv2.face.LBPHFaceRecognizer_create()
recognizer.train(training_images, labels)

3. Define Face Detection Function:

python
def detect_faces(frame):
gray = cv2.cvtColor(frame, cv2.COLOR_BGR2GRAY)
faces = face_cascade.detectMultiScale(gray, scaleFactor=1.1, minNeighbors=5)
return faces

4. Real-Time Recognition:

python
cap = cv2.VideoCapture(0)
while True:
ret, frame = cap.read()
faces = detect_faces(frame)
for (x, y, w, h) in faces:
cv2.rectangle(frame, (x, y), (x+w, y+h), (255, 0, 0), 2)
cv2.imshow("Face Recognition", frame)
if cv2.waitKey(1) & 0xFF == ord('q'):
break
cap.release()
cv2.destroyAllWindows()

Step 5: Testing and Optimization

Testing and optimizing your facial recognition system is crucial to ensuring its reliability and accuracy. This step involves validating the system’s performance under various conditions, fine-tuning its parameters, and integrating additional features to enhance its functionality.

1. Running Initial Tests

Begin by running the program and positioning faces in front of the camera. Observe how the system detects and recognizes faces, noting any missed detections or false positives. Testing should be performed in different lighting conditions and from various angles to simulate real-world scenarios.

  • Low Light Conditions: Assess the camera’s ability to detect faces in dimly lit environments. If the system struggles, consider adding an infrared camera or external lighting.
  • Dynamic Backgrounds: Test the system in environments with moving objects or cluttered backgrounds to check its robustness.

2. Adjusting Detection Parameters

If the system fails to detect faces accurately, modify the detection function’s parameters. Key parameters to adjust include:

  • scaleFactor: Controls the size reduction of the image at each scale. Smaller values (e.g., 1.1) detect smaller faces but increase processing time.
  • minNeighbors: Determines the number of neighboring rectangles that must be present for a face to be detected. Higher values reduce false positives but may miss smaller faces.

Example adjustments in Python:

python
faces = face_cascade.detectMultiScale(
gray, scaleFactor=1.2, minNeighbors=6, minSize=(30, 30)
)

3. Evaluating Recognition Accuracy

Evaluate the system’s ability to differentiate between known and unknown faces. Test with multiple images of the same person under various conditions to ensure consistency. If recognition rates are low:

  • Increase the number of training images for each person.
  • Use images with diverse expressions, angles, and lighting.
  • Enhance preprocessing by ensuring all training images are uniform in size and grayscale.

4. Implementing Alerts and Notifications

Add features to alert users when unknown faces are detected.

  • Audible Alerts: Use a buzzer or speaker to signal intrusions.
  • Visual Alerts: Display warning messages on connected monitors or LEDs.
  • Remote Notifications: Configure the system to send email or SMS alerts with a snapshot of the detected face.

Python example for sending email alerts:

python
import smtplib
from email.mime.text import MIMEText

def send_alert(face_image_path):
msg = MIMEText("Unknown face detected!")
msg['Subject'] = 'Security Alert'
msg['From'] = 'your_email@example.com'
msg['To'] = 'recipient@example.com'

with open(face_image_path, 'rb') as img:
msg.add_attachment(img.read(), maintype='image', subtype='jpeg', filename='intruder.jpg')

server = smtplib.SMTP('smtp.gmail.com', 587)
server.starttls()
server.login('your_email@example.com', 'your_password')
server.send_message(msg)
server.quit()

5. Long-Term Monitoring and Maintenance

For continuous use, monitor the system’s performance over time.

  • Data Storage: Regularly back up face data and logs to prevent loss.
  • Software Updates: Keep Raspberry Pi OS and OpenCV updated for the latest security patches and features.
  • Hardware Maintenance: Clean the camera lens and check connections to ensure consistent performance.

Expanding the System

Once the basic facial recognition system is operational, consider enhancing it with advanced features and functionalities to make it more robust and versatile.

1. Database Integration for Logs

Connect the system to a database to log entries, including timestamps, recognized names, and images. This feature is valuable for monitoring and auditing.

  • Use SQLite or MySQL for local or networked databases.
  • Store both metadata (e.g., time, name) and image snapshots for future reference.

Example for logging in SQLite:

python
import sqlite3

def log_entry(name, timestamp):
conn = sqlite3.connect('face_logs.db')
cursor = conn.cursor()
cursor.execute("CREATE TABLE IF NOT EXISTS logs (name TEXT, timestamp TEXT)")
cursor.execute("INSERT INTO logs (name, timestamp) VALUES (?, ?)", (name, timestamp))
conn.commit()
conn.close()

2. Access Control Integration

Enhance security by connecting the system to relays for controlling locks, gates, or barriers. This allows the system to grant or deny access based on facial recognition results.

  • Example: Unlock a door when a recognized face is detected.
  • Use GPIO pins on the Raspberry Pi to control a relay module.

Python code for relay control:

python
import RPi.GPIO as GPIO
import time

RELAY_PIN = 18
GPIO.setmode(GPIO.BCM)
GPIO.setup(RELAY_PIN, GPIO.OUT)

def unlock_door():
GPIO.output(RELAY_PIN, GPIO.HIGH)
time.sleep(5)
GPIO.output(RELAY_PIN, GPIO.LOW)

3. Remote Monitoring and Alerts

Set up a web interface or mobile app to monitor the system and receive alerts remotely.

  • Web Interface: Use Flask or Django to create a dashboard that displays live video feeds, logs, and alerts.
  • Mobile Integration: Build an app using platforms like Firebase to receive push notifications.

4. Multi-Factor Authentication

Combine facial recognition with other security measures for enhanced protection.

  • Add fingerprint sensors or RFID readers for additional authentication layers.
  • Require a combination of face detection and a password for access.

5. Integration with IoT Devices

Expand the system’s functionality by integrating with other smart devices.

  • Use MQTT protocols to communicate with smart lights, cameras, or alarms.
  • Example: Turn on lights or sound alarms when an unknown face is detected.

6. Advanced Recognition Techniques

Enhance the recognition algorithm for greater accuracy and functionality.

  • Deep Learning: Use pre-trained models like TensorFlow or PyTorch for more sophisticated face recognition.
  • Emotion Detection: Analyze facial expressions to detect moods or stress levels.

7. Scalability for Larger Deployments

For larger spaces or multiple entry points, deploy multiple Raspberry Pi 5 units networked together. Use a central server to manage data and synchronize face databases across all units.

By expanding the system in these ways, your Raspberry Pi 5 facial recognition project can evolve into a comprehensive security solution tailored to various environments and applications.

1. What is facial recognition technology, and how does it work?
Facial recognition technology identifies or verifies a person by analyzing their facial features using algorithms that compare live images or video feeds with stored data.

2. Why use Raspberry Pi 5 for building a facial recognition system?
The Raspberry Pi 5 is cost-effective, compact, and powerful, with advanced processing capabilities ideal for running real-time applications like facial recognition.

3. What are the key components required for this project?

  • Raspberry Pi 5
  • Camera module or USB camera
  • MicroSD card (32GB or higher)
  • Power supply
  • OpenCV software library

4. Is OpenCV free to use?
Yes, OpenCV is an open-source library available for free, providing extensive tools for computer vision and image processing tasks.

5. Can I use a USB webcam instead of the Raspberry Pi Camera Module?
Yes, a USB webcam is fully compatible with Raspberry Pi 5 and can be used for this project.

6. How accurate is facial recognition using Raspberry Pi 5?
Accuracy depends on factors like the quality of training images, camera resolution, and algorithm settings. Proper testing and optimization can significantly improve accuracy.

7. What programming language is used for this project?
Python is the primary language used, as it is well-supported by Raspberry Pi and OpenCV.

8. How do I improve the accuracy of facial recognition?

  • Use high-quality images for training.
  • Include diverse images with different lighting and angles.
  • Optimize OpenCV parameters like scaleFactor and minNeighbors.

9. Can I send alerts to my phone when an unknown face is detected?
Yes, you can configure the system to send SMS, email, or push notifications using Python libraries like smtplib or APIs like Twilio or Firebase.

10. How do I secure my system from being hacked?

  • Use secure passwords for the Raspberry Pi and email accounts.
  • Update software regularly.
  • Limit network access and use firewalls.

11. Can this system work offline?
Yes, the facial recognition system can work without an internet connection if remote alerts or updates are not required.

12. How do I add a new person to the system?
Capture multiple images of the person, preprocess the images, and retrain the recognition model with the updated dataset.

13. What are some potential applications of this system?

  • Home security systems
  • Office access control
  • Attendance monitoring
  • Smart surveillance

14. Can the system detect multiple faces at once?
Yes, OpenCV’s face detection algorithms can identify multiple faces in a frame simultaneously.

15. Is it possible to integrate this system with other IoT devices?
Yes, you can integrate it with IoT devices like smart locks, lights, or alarms using MQTT or other communication protocols.

Explore tutorials, documentation, and updates for the OpenCV library.
Website: https://opencv.org
Skip to content